

There’s nothing quite like a steaming bowl of homemade chili to bring warmth and comfort to your dinner table. This classic chili recipe offers a rich, slow-cooked flavor that, surprisingly, comes together in about 30 minutes of active cooking time, making it the ultimate cozy weeknight dinner solution. It’s a guaranteed crowd-pleaser that requires minimal prep and cleanup, all cooked conveniently in a single pot. Whether you’re feeding a hungry family or entertaining guests, this hearty beef chili recipe is designed for both ease and exceptional taste, ensuring a satisfying meal every time.
For those looking to explore different chili profiles, our White Chicken Chili offers a delightful alternative, showcasing the incredible versatility of this beloved dish.

Beyond its incredible flavor, this classic chili recipe is a powerhouse of nutrition, packed with protein, wholesome vegetables, and a medley of aromatic warm spices. This makes it a fantastic family-friendly meal that’s both incredibly nourishing and irresistibly delicious. One of its greatest strengths is its adaptability; you can effortlessly adjust this recipe to suit your family’s specific needs or preferences. Expecting a larger gathering? Simply double the recipe for a generous batch! Want to boost the vegetable content? Feel free to sneak in extra veggies like bell peppers, zucchini, or carrots – they’ll blend seamlessly into the robust flavors and add even more goodness.
The Best Classic Chili Recipe You’ll Ever Make
I have a deep affection for easy, cozy, and comforting dinners, and this classic chili recipe truly embodies all of those qualities. It’s more than just a meal; it’s an experience that brings people together, warming them from the inside out. The depth of flavor achieved in such a short amount of time is truly remarkable, making it a staple in my kitchen and a frequent request from my family and friends.
If you’re as passionate about chili as I am and eager to explore a wider range of chili recipes, you’re in luck! There are so many exciting variations to try, each offering its own unique twist on this timeless comfort food. From hands-off slow cooker options to leaner, vegetable-packed versions, there’s a chili for every occasion and every dietary preference. Let’s dive into some more fantastic chili creations:
- For ultimate convenience, let your slow cooker handle the heavy lifting with my Super Easy Slow Cooker Chili, a perfect choice for busy days.
- Looking for an adventurous and incredibly nutritious option? Don’t miss out on my unique Slow Cooker Beet Chili.
- For a poultry-based delight, my Slow Cooker Chicken Chili is a lighter yet equally satisfying meal.
- If you’re aiming for a leaner meal without compromising on flavor, consider my wholesome Extra Lean Turkey Chili with Kale or the delightfully hearty Easy Whole30 Sweet Potato Chili.
For even more culinary inspiration and a comprehensive guide to delicious chili, be sure to check out my extensive collection: Top 30 Healthy Chili Recipes. You’ll find a wide array of options to satisfy any craving and cater to various health-conscious eating plans.
Essential Ingredients for Your Classic Chili Recipe
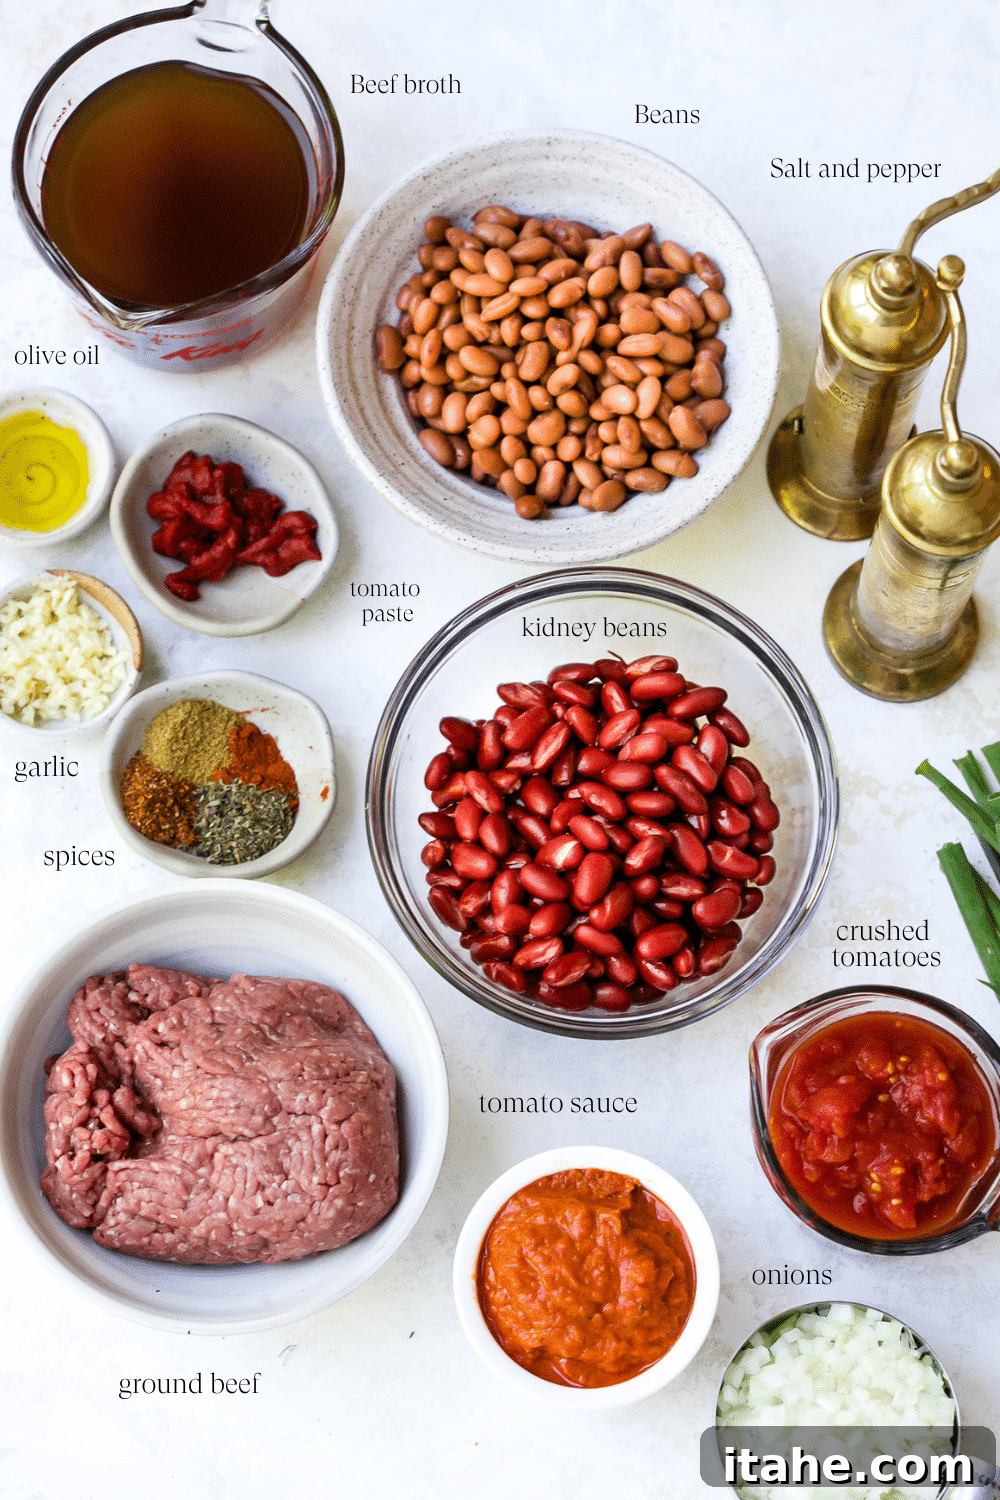
Crafting the perfect classic chili starts with a careful selection of fresh, high-quality ingredients. Each component plays a vital role in building the layered flavors and rich texture that make this dish so comforting and satisfying. Here’s what you’ll need to create this culinary masterpiece:
- Extra Virgin Olive Oil: The foundation for sautéing. You can also opt for avocado or grapeseed oil for their high smoke points and neutral flavors.
- Onion: We recommend a white onion for its crisp, mild flavor, which sweetens beautifully when cooked. A yellow onion would also be an excellent substitute.
- Garlic: A key flavor enhancer. Feel free to adjust the amount of garlic to match your personal preference. Freshly minced cloves are ideal, but jarred minced garlic can also be used for convenience.
- Ground Beef: The heart of this classic chili. I prefer using extra lean ground beef to reduce excess fat, but any ground beef works well.
- Tomato Paste: A small but mighty ingredient that adds a surprising depth of umami and concentrates the tomato flavor, enriching the overall taste of the chili.
- Crushed Tomatoes: Essential for the chili’s body and tangy tomato base. Any canned, crushed tomatoes will deliver excellent results.
- Beans: A cornerstone of classic chili. I typically use a combination of canned kidney and pinto beans, both drained and rinsed, for varied texture and flavor.
- Tomato Sauce: Contributes to the smooth, rich consistency of the chili. Use your favorite store-bought brand, or for an extra touch of homemade goodness, try my easy homemade tomato sauce recipe.
- Beef Broth: Provides the necessary liquid and infuses the chili with a deep, savory background flavor. Regular beef broth is great, but a low-sodium option is perfect for controlling salt content.
- Signature Seasonings: A carefully balanced blend of chili powder, dried oregano, ground cumin, paprika, cayenne pepper (for an optional kick), kosher salt, and freshly ground black pepper. These spices are crucial for achieving that characteristic chili flavor.
- Delicious Toppings: The perfect chili experience is elevated with the right toppings. Serve generously with shredded cheddar cheese, a dollop of cool sour cream, crunchy tortilla chips, and a sprinkle of chopped green onion or fresh cilantro.
Step-by-Step Instructions to Make Your Best Classic Chili
Making a truly exceptional pot of classic chili is simpler than you might think, especially with these clear, concise instructions. Follow these steps to achieve a perfectly balanced and flavorful dish that will impress everyone at your table.
Sauté Aromatics – The Flavor Foundation:
- In a large, heavy-bottomed pot or a Dutch oven, heat one tablespoon of extra virgin olive oil over medium heat until it shimmers. This is the first step in building a rich flavor base.
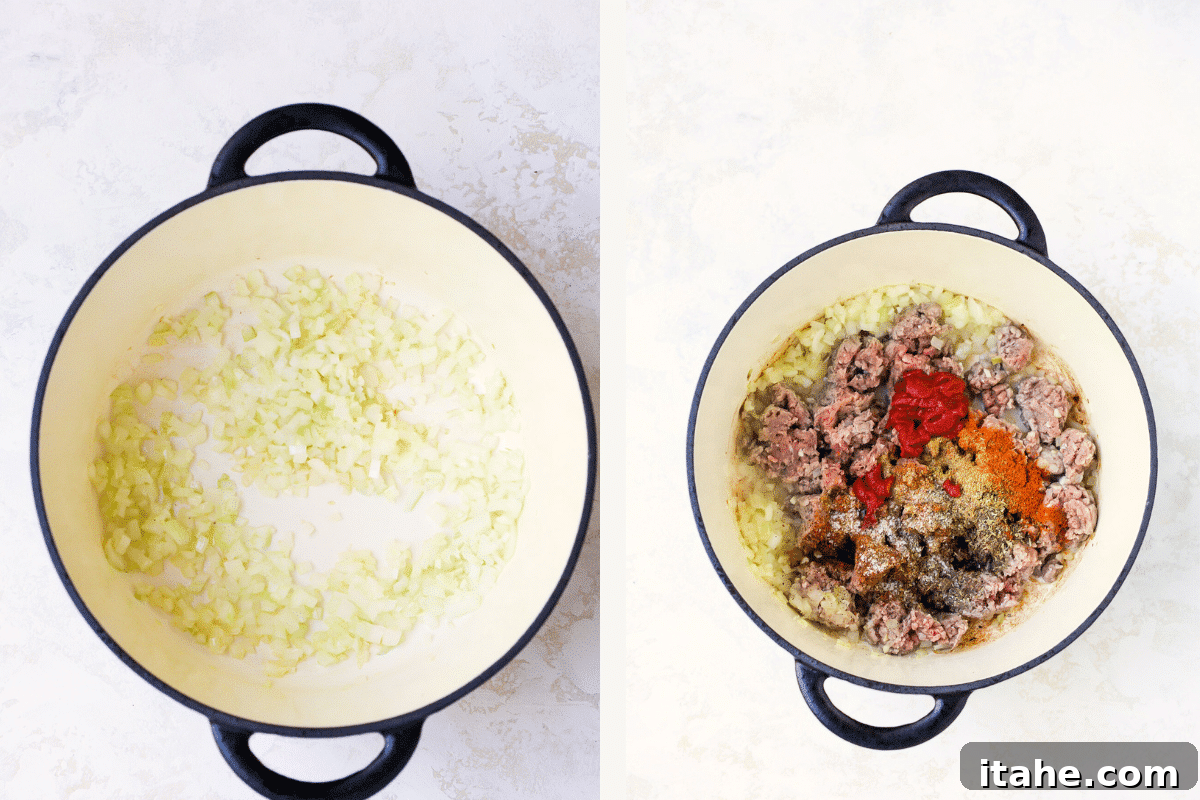
- Add the chopped onions to the hot oil and cook for approximately 3-5 minutes, stirring occasionally. You want them to soften and become translucent, releasing their natural sweetness.
- Next, stir in the minced garlic and cook for just an additional minute. Be careful not to burn the garlic, as this can lead to a bitter taste. It should become fragrant and lightly golden.
Build the Heart of the Chili – Tomato Paste and Ground Beef:
- Add the tomato paste to the pot with the sautéed onions and garlic. Stir well, ensuring the vegetables are thoroughly coated. Cooking the tomato paste briefly helps to deepen its flavor.
- Introduce the ground beef to the pot. Using a wooden spoon or spatula, break up the meat into small crumbles as it cooks. Continue to cook for about 7 minutes, or until the beef is fully browned and no longer pink.
- Once the beef is cooked, carefully drain any excess fat from the pot. This step is crucial for preventing a greasy chili and allows the flavors to shine through cleanly.
Infuse with Spices – The Soul of Chili:
- Generously season the beef and aromatics with kosher salt and freshly ground black pepper. Don’t be shy here; proper seasoning is essential.
- Now, sprinkle in the chili powder, dried oregano, ground cumin, and paprika. If you enjoy a bit of heat, add the cayenne pepper at this stage (it’s optional, so adjust to your liking).
- Stir the spices thoroughly into the meat mixture, cooking for another minute to allow their aromas to bloom and toast slightly. At this point, take a small taste and adjust the seasonings to your preference before adding liquids.
Combine Wet Ingredients – Bring it All Together:
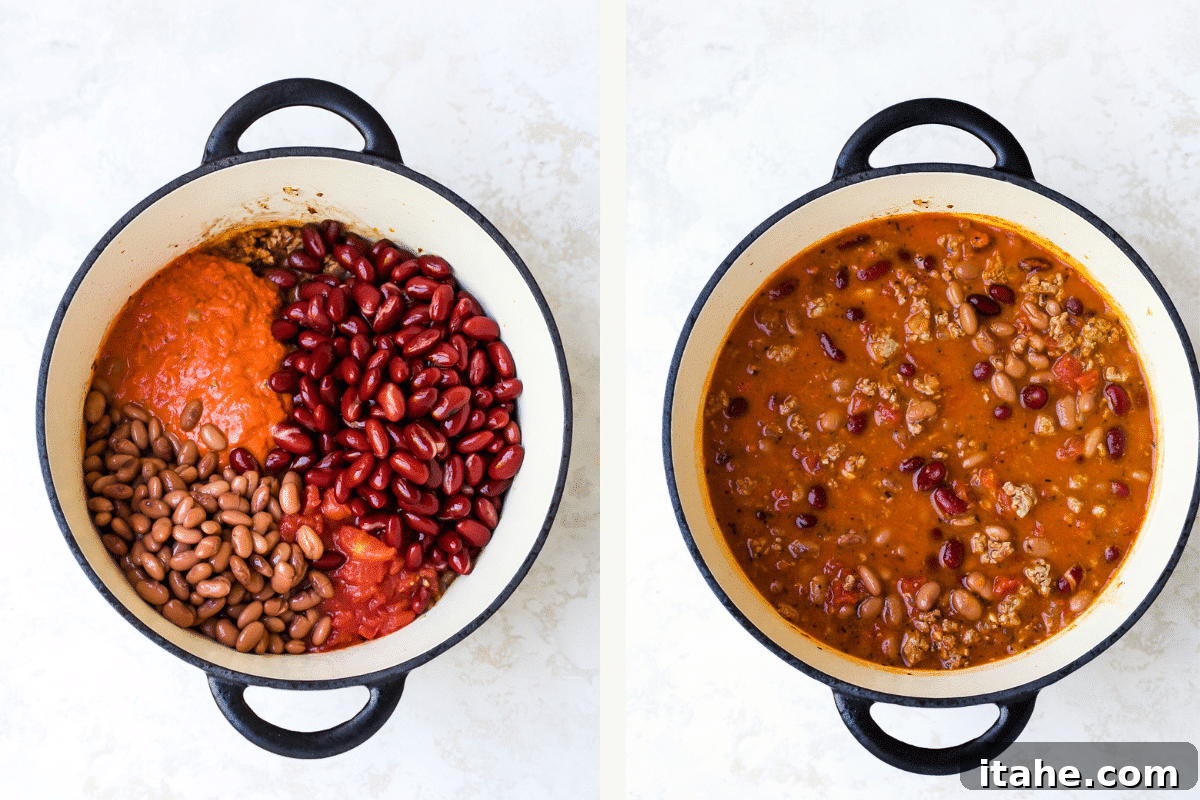
- Pour in the canned crushed tomatoes, rich tomato sauce, both pinto beans and kidney beans (remember to drain and rinse them), and the savory beef broth.
- Stir all the ingredients together until they are well combined, ensuring an even distribution of flavors throughout the pot.
Simmer to Perfection – Marrying the Flavors:
- Bring the entire mixture to a gentle boil over medium-high heat.
- Once boiling, reduce the heat to medium-low, cover partially, and let the chili simmer for at least 20 minutes, stirring occasionally. This simmering period is crucial for allowing all the flavors to meld together beautifully and for the liquid to reduce slightly, creating a thick, rich consistency. The longer it simmers, the deeper the flavor will become.
- Before serving, taste the chili again and add more salt and pepper if needed to achieve your desired seasoning level.
Garnish and Enjoy – The Grand Finale:
- Ladle generous portions of your perfectly cooked beef chili into bowls.
- Top with a mound of shredded cheddar cheese, a dollop of cool sour cream, and a sprinkle of vibrant sliced green onions or fresh cilantro.
- Serve immediately and savor every comforting bite!

Expert Chili Recipe Tips for Success
Achieving the best possible chili often comes down to a few key techniques and smart adjustments. Here are some expert tips to ensure your classic chili turns out perfectly every time, maximizing flavor and catering to various preferences:
- Leaner Protein Options: While ground beef is traditional, don’t hesitate to experiment! If you prefer a leaner protein, feel free to swap the beef in this recipe for ground turkey or ground chicken. These alternatives offer a lighter touch while still providing a hearty base.
- Don’t Skip the Sauté: The initial sautéing and browning steps for the onions, garlic, and ground meat are absolutely critical. This process creates a deep, caramelized flavor foundation, adding immense depth and complexity to the overall taste of your chili. Rushing this step will result in a less flavorful dish.
- Mind Your Sodium: If you’re conscious about your sodium intake, opt for a low-sodium beef broth. You can always adjust the salt content to your preference at the end of cooking, ensuring it’s just right for you.
- Bean Variety: Get creative with your beans! While kidney and pinto beans are classic, you can easily swap them for different varieties like black beans, navy beans, or even cannellini beans to alter the texture and flavor profile.
- Make Ahead and Freeze: Chili is an excellent dish for meal prepping. Consider making a double batch of this classic chili recipe. Enjoy one batch immediately and freeze the other half in airtight containers or freezer-safe bags for a quick, delicious, and convenient meal on a busy day. It reheats beautifully!
- Taste as You Go: Seasoning is personal. Continuously taste your chili throughout the cooking process, especially after adding spices and after simmering. This allows you to adjust salt, pepper, and other seasonings to perfectly suit your palate.
- Sweetness Balance: A touch of sweetness can balance the acidity of tomatoes and the heat of spices. A pinch of sugar or a small amount of grated carrot can enhance the overall flavor profile without making the chili overtly sweet.
How to Store, Freeze, and Reheat Leftover Chili
One of the many benefits of a classic chili recipe is how well it keeps, often tasting even better the next day as the flavors continue to meld. Proper storage and reheating ensure you can enjoy your delicious homemade chili for days or even months to come.
- To Store in the Fridge: Allow your leftover chili to cool completely to room temperature before storing. Transfer it to an airtight container and refrigerate for up to 4 days. For best results and to prevent sogginess, store any desired toppings (like cheese, sour cream, or green onions) separately and add them fresh when serving.
- To Freeze for Longer Storage: Chili freezes exceptionally well! Once cooled, transfer your leftovers to a freezer-safe container or a heavy-duty Ziploc bag (freezer bags are great for saving space). Ensure there’s minimal air in the container or bag to prevent freezer burn. Freeze for up to 3 months. To save precious freezer space, especially with bags, lay them flat until frozen solid, then stack them.
- To Reheat:
- From the Fridge: Reheat individual portions in the microwave until heated through, stirring occasionally. For larger batches, gently reheat on the stovetop over medium-low heat, stirring frequently to prevent sticking.
- From Frozen: Thaw frozen chili in the refrigerator overnight before reheating. If you’re short on time, you can reheat it directly from frozen on the stovetop over very low heat, stirring often and breaking it up as it thaws, or in the microwave using a defrost setting followed by regular heating.
If your chili seems a bit too thick after being in the fridge or freezer, you can add a little water, beef broth, or even a splash of beer (for extra flavor) during reheating to achieve your desired consistency.
What to Serve With Your Classic Chili
A bowl of classic chili is a meal in itself, but pairing it with the right accompaniments and toppings can elevate the dining experience to new heights. Here are some fantastic ideas to complete your chili feast:
- Warm Bread Selections: Fresh, warm bread is arguably the coziest accompaniment to this hearty classic chili recipe. It’s perfect for dipping and soaking up every last drop of the rich sauce.
- Serve it alongside toasty garlic bread for an aromatic touch.
- For a comforting Southern-inspired pairing, bake up some fluffy gluten-free cornbread or classic cornbread.
- Consider serving with easy low-carb dinner rolls and a side of homemade garlic butter for a delightful combination.
- The Best Toppings Bar: The right selection of toppings will transform a good bowl of chili into an extraordinary one, allowing everyone to customize their meal.
- My personal favorites include a generous sprinkle of shredded cheddar cheese, a cooling dollop of sour cream, and a scattering of vibrant sliced green onions.
- You can also experiment with your favorite hot sauce for an extra kick, fresh herbs like parsley or cilantro, or creamy slices of avocado for a touch of richness.
- Consider adding crispy fried onions, crushed corn chips, or a squeeze of lime juice for brightness.
- Crunchy Crackers for Texture: Add both flavor and a satisfying textural contrast to your dish with a variety of crunchy crackers.
- Classic oyster crackers or simple saltines are perfect for crumbling directly into your chili.
- For a low-carb alternative, try my delightful almond flour crackers.
- Light & Refreshing Side Salads: This rich, hearty chili pairs wonderfully with a light and fresh side salad, offering a crisp counterpoint to the robust flavors.
- Try it with my flavorful parmesan Brussels sprouts salad.
- An easy broccoli salad recipe offers a crunchy, refreshing bite.
- A classic coleslaw recipe provides a tangy, cool contrast.
Creative Recipe Variations to Customize Your Chili
One of the most exciting aspects of cooking chili is its incredible versatility. This classic chili recipe serves as a perfect canvas for countless variations, allowing you to tailor it to your taste, dietary needs, or whatever ingredients you have on hand. Don’t be afraid to experiment and make it your own!
- Boost with Extra Veggies and Legumes: This easy chili recipe is an excellent vehicle for loading up on vegetables or utilizing produce that needs to be used from your fridge.
- Add diced bell peppers (any color!), zucchini, corn, mushrooms, or sweet potatoes for added nutrition and texture.
- You can also introduce other legumes like chickpeas or black-eyed peas for more fiber and protein.
- For a dedicated veggie-packed experience, try my equally delicious Sweet Potato Chili.
- Dietary Adjustments: Whole30 or Keto-Friendly: With just a couple of thoughtful adjustments, you can easily adapt this recipe to fit specific dietary requirements without sacrificing flavor.
- For a Whole30 compliant version, omit the beans and ensure your broth and tomato products contain no added sugars or preservatives. You can bulk it up with extra vegetables instead of beans.
- To make it Keto-friendly, again, remove the beans and any ingredients high in carbohydrates. Focus on healthy fats and lean proteins.
- For more detailed inspiration on Keto or Whole30 variations, check out my specialized recipes like Instant Pot Keto Chili or the flavorful Easy Whole30 Pumpkin Chili.
- Deepen and Diversify the Flavor Profile: The beauty of chili lies in its ability to handle a wide array of bold flavors. Feel free to play with the spice profile to match your preferences.
- For Extra Spice: If you crave more heat, incorporate additional red pepper flakes, a dash of your favorite hot sauce, or even a finely minced jalapeño or serrano pepper when sautéing the aromatics.
- For a Sweeter Touch: If you prefer a chili on the sweeter side, try using sweet paprika instead of regular, or add a pinch of cinnamon or a tablespoon of brown sugar (if not adhering to Whole30/Keto) to balance the savory notes. A tablespoon of cocoa powder can also add an unexpected richness and depth.
- Smoky Undertones: A splash of liquid smoke or a pinch of smoked paprika can infuse your chili with a wonderful smoky character.
- Creative Serving Ideas – Beyond the Bowl: While a bowl of chili is classic, there are many innovative ways to enjoy this versatile dish.
- One of my absolute favorite ways to eat this classic chili recipe is generously spooned over a fluffy baked potato or sweet potato. Each component is comforting on its own, and together they create an even more satisfying meal.
- Try making a variation of my taco stuffed sweet potatoes by using this classic chili recipe as the delicious filling instead of traditional taco meat.
- Use it as a topping for hot dogs, nachos, or even as a filling for quesadillas or burritos.
- Serve it over rice or pasta for a complete meal.
More Delicious One-Pot Dinners
Simplify your meal prep and reduce dish duty with these fantastic one-pot dinner recipes, perfect for any night of the week.
Whole30 Jambalaya Recipe
Total Time: 25 mins
Kale Tortellini Soup
Total Time: 22 mins
Cabbage and Sausage Skillet Recipe
Total Time: 40 mins
Spicy Chicken and Cauliflower Rice
Total Time: 30 mins

Classic Chili Recipe
Author: Olivia Ribas
Servings: 8 people
Prep Time: 15 minutes
Cook Time: 30 minutes
Total Time: 45 minutes
A Classic Chili Recipe with a rich, slow-cooked flavor that comes together in about 30 minutes. This recipe checks all of the boxes for the perfect cozy weeknight dinner! It is a crowd pleaser every time, requires very little prep work, and cooks in just one pan.
Ingredients
- 1 tbsp extra-virgin olive oil
- 1 cup white onion, chopped
- 3 cloves garlic, finely chopped
- 2 tbsp tomato paste
- 1 lb ground beef
- 1 tsp chili powder
- 1 tsp ground coriander
- 1 tsp ground cumin
- 1/2 tsp paprika
- 1/4 tsp cayenne pepper (optional)
- Kosher salt and freshly ground black pepper, to taste
- 1 cup can crushed tomatoes
- 1 (15-oz.) can kidney beans, drained and rinsed
- 1 (15-oz.) can pinto beans, drained and rinsed
- 1 cup tomato sauce
- 1 cup beef broth
- For serving: shredded cheddar cheese, sour cream, and chopped green onions
Instructions
- Heat 1 tablespoon of olive oil in a large pot or Dutch oven over medium heat.
- Add the chopped onions and cook for about 3-5 minutes, stirring occasionally until they become soft and translucent.
- Stir in the finely chopped garlic and cook for an additional minute until fragrant.
- Mix in the tomato paste, ensuring it thoroughly coats the vegetables.
- Add the ground beef, breaking it up with a spoon as it cooks. Cook for approximately 7 minutes, or until the meat is no longer pink. Drain any excess fat from the pot.
- Sprinkle in the chili powder, ground coriander, ground cumin, paprika, and cayenne pepper (if using). Season generously with kosher salt and freshly ground black pepper. Stir well to combine.
- Pour in the crushed tomatoes, kidney beans, pinto beans, tomato sauce, and beef broth. Stir everything together until well combined.
- Bring the mixture to a boil, then reduce the heat to medium-low. Let it simmer, partially covered, for about 20 minutes, stirring occasionally. This allows the flavors to meld and the chili to thicken slightly. Taste and adjust seasoning with more salt and pepper if needed.
- Ladle the chili into bowls and top with shredded cheddar cheese, sour cream, and sliced green onions. Serve hot and enjoy!
Recipe Notes
- Feel free to swap the beef in this recipe for ground turkey or chicken for a lighter option.
- Don’t skip the sautéing and browning steps for the onions, garlic, and ground meat; this step adds significant depth to the chili’s flavor.
- If monitoring sodium intake, use a low-sodium beef broth.
- Experiment with different bean varieties like black beans or navy beans to change the texture and flavor.
- This recipe is perfect for doubling; make a larger batch and freeze half for a convenient future meal.
- To Store: Cool completely and store in an airtight container in the fridge for up to 4 days. Store toppings separately.
- To Freeze: Store in a freezer-safe container or Ziploc bag for up to 3 months. Lay bags flat to save space.
- To Reheat: Reheat in the microwave or on the stovetop. If chili is too thick, add a little water or broth.
Nutrition Facts (Approximate per Serving)
Serving: 1/8 of recipe
- Calories: 252 kcal
- Carbohydrates: 26 g
- Protein: 19 g
- Fat: 9 g
- Cholesterol: 36 mg
- Sodium: 540 mg
- Potassium: 199 mg
- Fiber: 7 g
- Sugar: 5 g
Nutrition information is automatically calculated and should be used as an approximation only. Actual values may vary based on ingredients and preparation methods.