
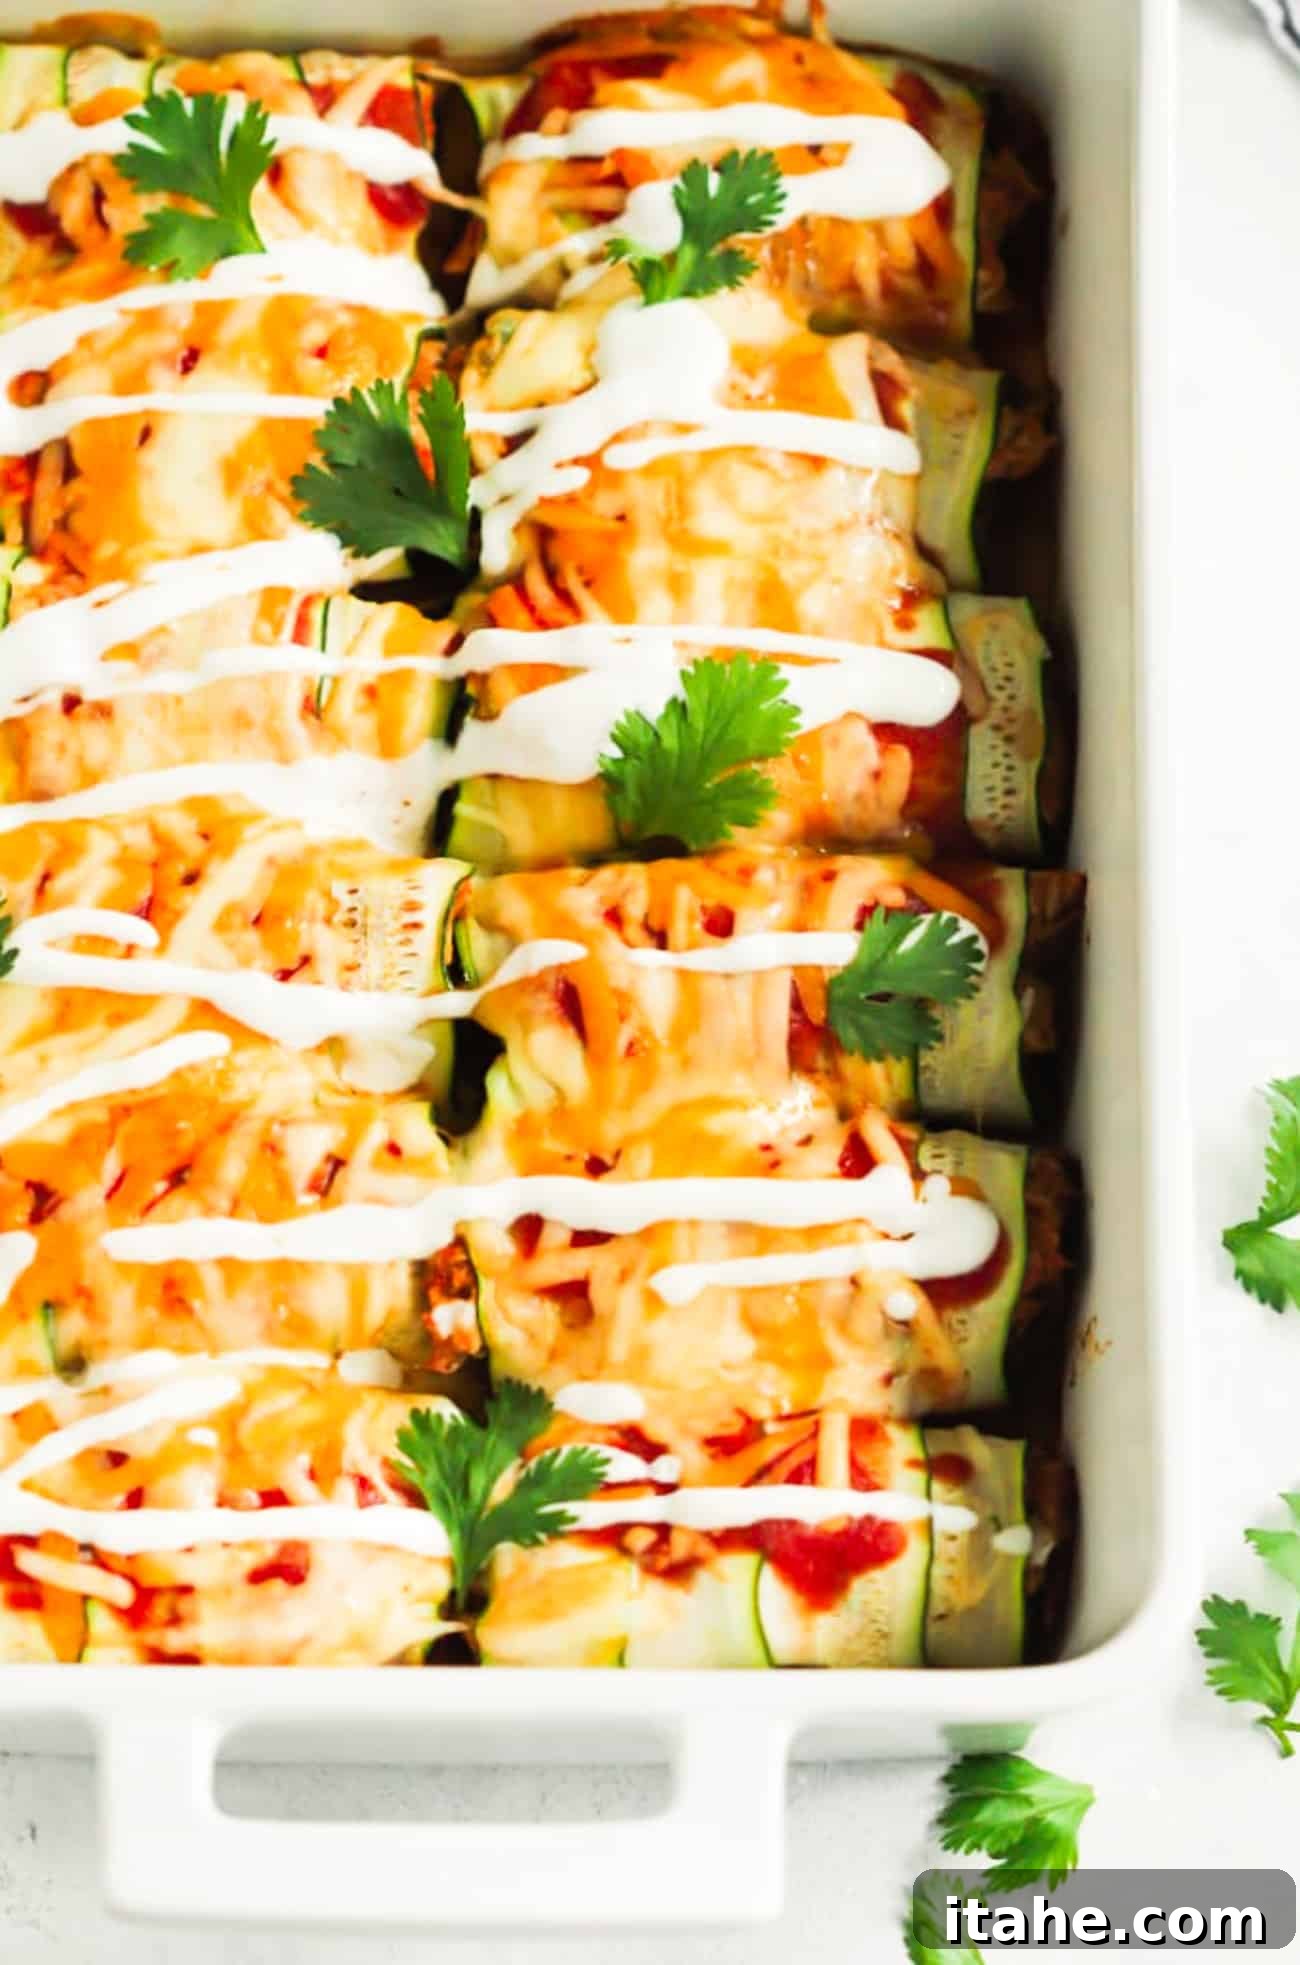
Craving the vibrant, bold flavors of Mexican cuisine but strictly adhering to your ketogenic diet? Your search ends here! These delectable Keto Chicken Enchiladas offer the ultimate solution for a mouthwatering, low-carb, and gluten-free meal that effortlessly satisfies your cravings without compromising your dietary goals. Instead of traditional flour or corn tortillas, this ingeniously crafted recipe utilizes thinly sliced zucchini to create a tender, flavorful, and incredibly healthy wrap. Every bite bursts with savory shredded chicken, rich enchilada sauce, perfectly melted cheese, and a refreshing dollop of tangy sour cream, culminating in a dish so satisfying it’s destined to become a staple in your home.
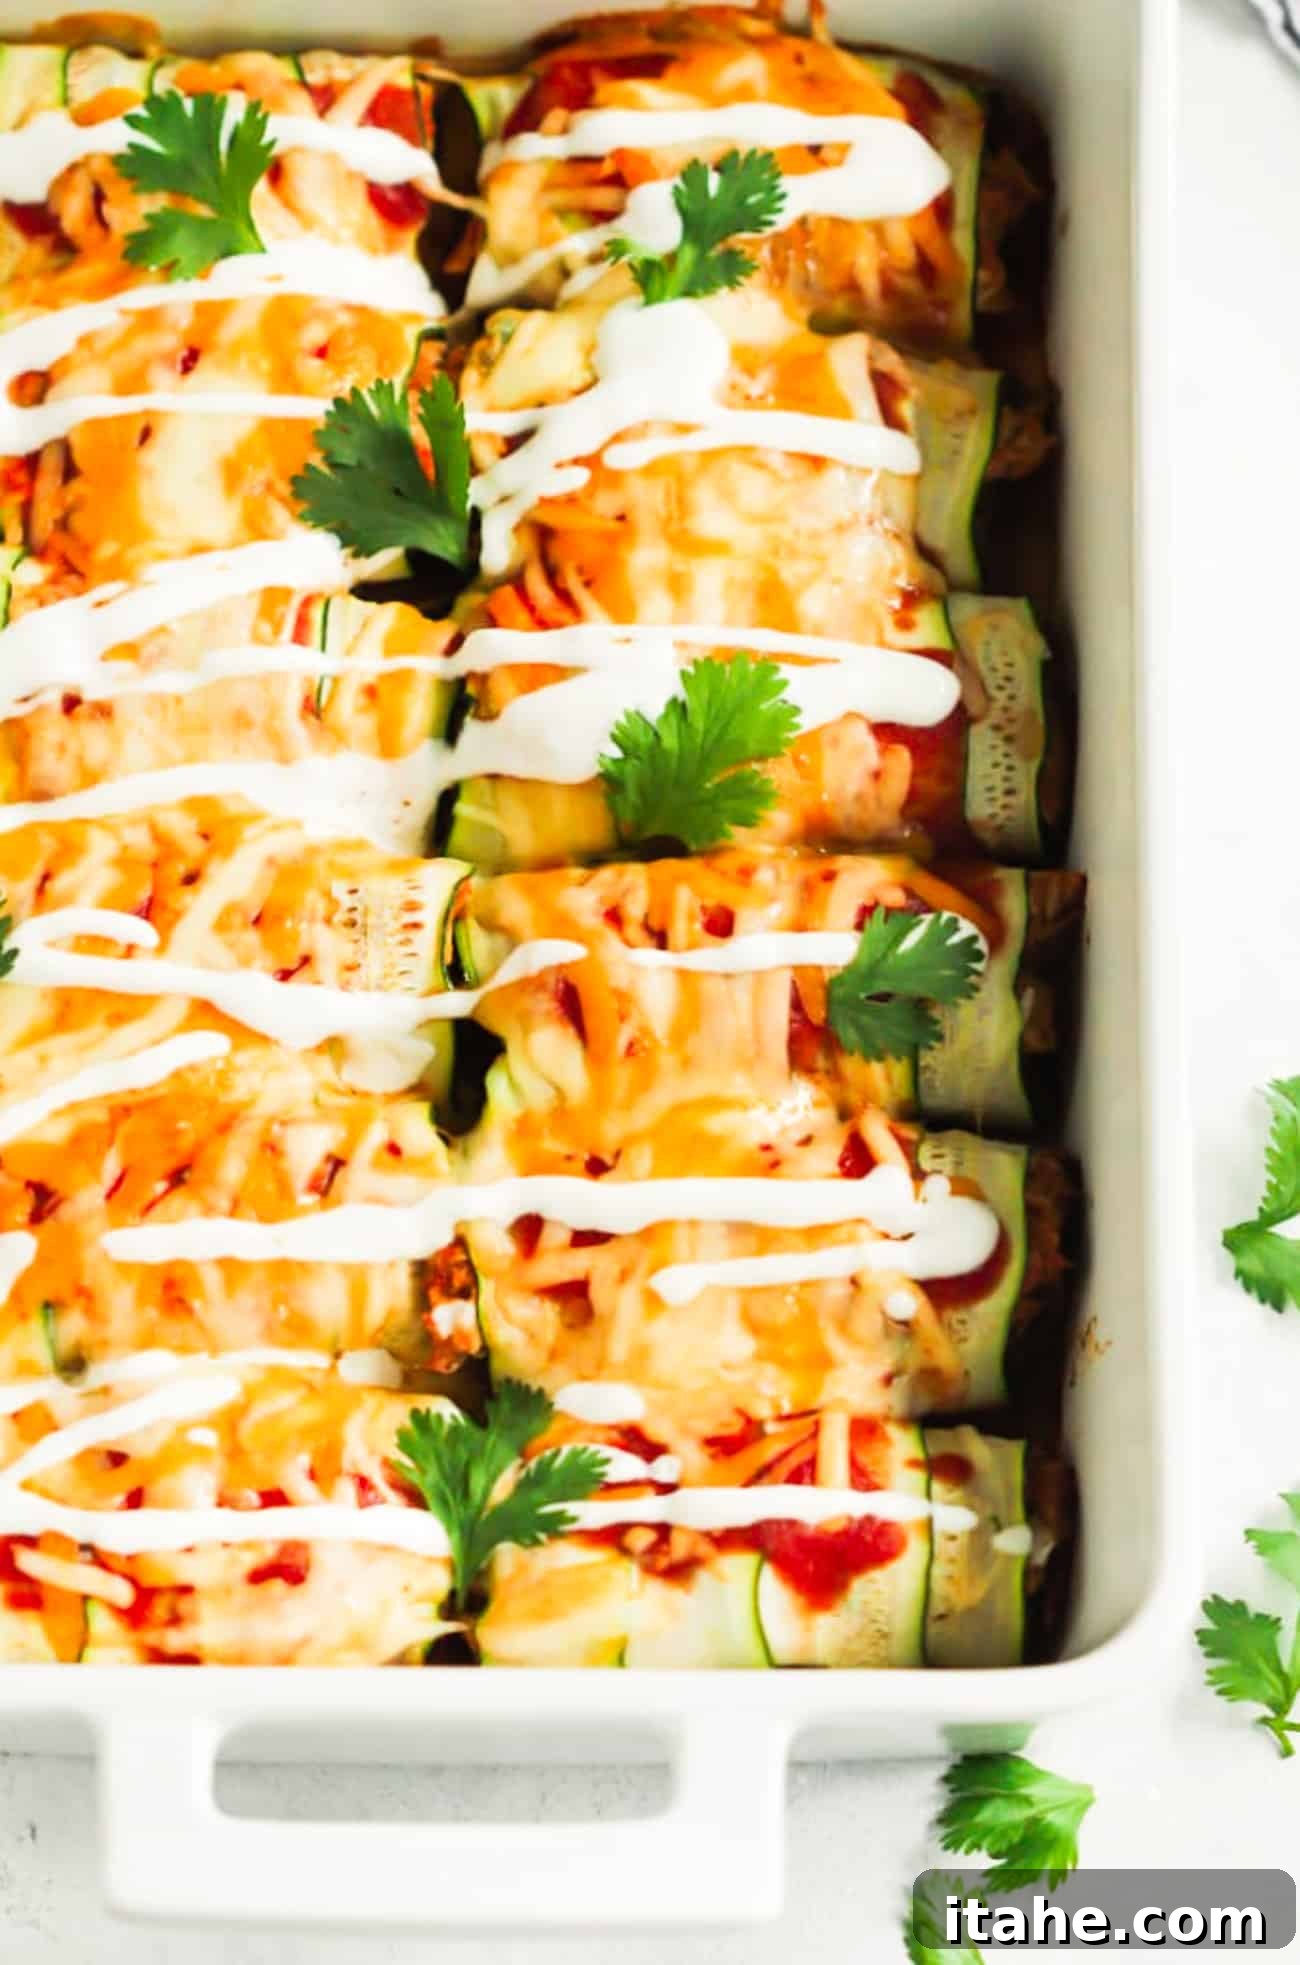
The concept of using zucchini as a “tortilla” might initially sound unconventional, even a little daring, but rest assured, the culinary results are nothing short of remarkable. I confess, I approached this recipe with a healthy dose of skepticism myself. However, after preparing the first batch, I was completely won over, and it quickly earned its place as a cherished favorite in our weekly meal rotation. The entire family, including my husband—who typically favors traditional Mexican fare—now enthusiastically reaches for second and even third servings! These lighter, healthier enchiladas deliver all the comforting warmth and robust flavors you adore in a classic enchilada, but with a fresh, low-carb twist that makes them perfectly suitable for any day of the week, from busy weeknights to relaxed weekend gatherings.
Why Choose Keto Chicken Enchiladas? Health Benefits & Lifestyle Appeal
Embracing a ketogenic lifestyle doesn’t mean you have to bid farewell to your beloved comfort foods or the rich tapestry of international cuisines. This keto chicken enchilada recipe serves as a brilliant example of just how incredibly flavorful, deeply satisfying, and authentically comforting low-carb meals can truly be. By ingeniously substituting high-carb flour or corn tortillas with fresh, nutrient-rich zucchini, you dramatically reduce the overall carbohydrate count of the dish. This makes it an ideal choice for maintaining ketosis while still indulging in a hearty, fulfilling dinner that doesn’t leave you feeling deprived. Moreover, zucchini itself is a nutritional powerhouse, brimming with essential vitamins, minerals, and beneficial antioxidants, thereby adding a wholesome boost to your meal without extra calories or carbs.
Beyond its impressive keto-friendly credentials, this dish boasts another significant advantage: it is naturally gluten-free. This makes it an excellent option for individuals managing gluten sensitivities, celiac disease, or for anyone simply looking to reduce their gluten intake for health or preference. The inherent versatility of this recipe is another strong point, as it can be easily customized to suit your personal preference for spice—whether you prefer a mild, family-friendly flavor profile or a fiery, zesty kick. This adaptability ensures that everyone at the dinner table, regardless of their palate, will find something to savor and adore. Whether you’re in search of a rapid, no-fuss weeknight dinner solution or a crowd-pleasing, healthy meal to serve at your next gathering, these zucchini chicken enchiladas stand out as a fantastic, wholesome choice that consistently delivers on both exceptional taste and precise dietary requirements.
Mastering the Zucchini “Tortillas”: Your Guide to Perfect Low-Carb Wraps
The undisputed secret to crafting these incredibly delicious and structurally sound keto enchiladas lies in the meticulous preparation of your zucchini “tortillas.” Achieving uniformly thin, pliable slices of zucchini is not merely a suggestion, but an absolutely crucial step for ensuring successful rolling and delivering a delightful, tender texture in the final dish. Slices that are too thick, unfortunately, tend to be brittle, prone to breaking during assembly, or may remain unpleasantly firm after baking, ultimately detracting from the overall enchilada experience. To help you master this vital component, here’s an in-depth guide on how to get them just right:
- Choosing Your Zucchini Wisely: When selecting your zucchini, always opt for specimens that are generously large and possess a firm, unblemished skin. Larger zucchinis are particularly advantageous as they yield longer and wider slices, which are ideally suited for wrapping substantial amounts of filling. Avoid any zucchini that feels soft, spongy, or shows signs of bruising, as these may not slice well.
- The Indispensable Tool for Precision: To achieve the consistent thinness required, a specialized tool is essential. A “Y” shaped vegetable peeler or, even better, a mandoline slicer, is your best friend in this endeavor. Attempting to use a standard kitchen knife, no matter how sharp it may be, almost invariably results in slices that are either too thick, uneven, or both. A mandoline, with its adjustable settings, offers unparalleled consistency and speed, making the slicing process effortless. A high-quality peeler, on the other hand, provides excellent control for individual, delicate slices.
- Aiming for Optimal Thinness: The target for your zucchini slices should be an almost translucent quality, yet they must retain enough integrity to hold together without tearing. This precise level of thinness is critical because it allows the zucchini to soften perfectly during the baking process, thereby remarkably mimicking the delicate, yielding texture of a traditional tortilla. Slices that are too thick will remain too crisp or firm, altering the intended mouthfeel.
- Proactive Moisture Management: It’s a well-known fact that zucchini contains a significant amount of water, which can sometimes lead to a watery or soggy dish if not managed properly. After you’ve finished slicing your zucchini, you might observe that the slices feel a bit damp or slippery. To counteract this, gently lay the slices on a clean kitchen towel or several layers of paper towels. Then, use additional paper towels to gently pat them dry, absorbing any excess moisture. This crucial step not only helps reduce the likelihood of a soggy final product but also makes the slices significantly easier to handle and roll, contributing to firmer, more cohesive enchilada wraps.
How to Make Irresistible Keto Chicken Enchiladas: A Detailed Step-by-Step Guide
Essential Ingredients for Your Keto Enchiladas
To embark on your culinary journey towards creating truly exceptional keto chicken enchiladas, the first and most crucial step is to gather a selection of fresh, high-quality ingredients. Each component, carefully chosen and combined, plays an indispensable role in building the intricate layers of flavor, aroma, and texture that define this remarkable dish:
- Extra Virgin Olive Oil: This serves as the foundational cooking medium for sautéing your aromatics, imbuing the initial flavors with a delicate, fruity richness. For an alternative that boasts a neutral flavor profile and an impressively high smoke point, ideal for healthy cooking at higher temperatures, avocado oil is an excellent substitute.
- Onion: As an undeniable staple in virtually all Mexican-inspired cuisines, a finely diced white or yellow onion forms the essential aromatic base of our flavorful filling. Sautéing it gently until it achieves a soft, translucent, and slightly golden-brown state coaxes out its natural sweetness and adds significant depth to the overall taste.
- Garlic: Freshly minced garlic, typically about 2 cloves for this recipe, is paramount for delivering a pungent, savory kick that brightens and elevates the entire dish. In instances where time is a constraint, a jar of pre-minced garlic can be a highly convenient and effective substitute, though fresh is always preferred for maximum impact.
- Seasonings: The heart of any authentic Mexican dish lies in its expertly balanced spice blend. This recipe calls for fundamental salt and black pepper to enhance all flavors, earthy ground cumin for its distinctive warm notes, and robust chili powder to introduce a comforting warmth and subtle heat. Feel free to adjust the quantities of these spices to perfectly align with your personal taste preferences.
- Chicken: For unparalleled convenience and efficiency, opting for pre-cooked and shredded chicken is a game-changer. This can often be sourced readily in the deli section of most grocery stores. Alternatively, a roasted rotisserie chicken is another fantastic and incredibly flavorful option—simply shred the meat, and it’s ready for your filling! If you prefer a more hands-on approach, you can gently poach boneless chicken breasts or thighs on the stovetop in water or chicken broth until they are thoroughly cooked, then shred them by hand for a tender texture.
- Gluten-Free Enchilada Sauce: A high-quality store-bought enchilada sauce is invaluable for saving considerable preparation time. However, it is absolutely crucial to meticulously double-check the ingredients list to unequivocally confirm that it is truly gluten-free, as certain brands may contain wheat-based thickeners. You can choose a mild variety for a universally appealing, family-friendly dish, or select a spicier blend if you crave a more pronounced kick. For ultimate control over ingredients and flavor, consider making your own enchilada sauce from scratch.
- Zucchini: You will need approximately 4 large-sized zucchinis to yield a sufficient quantity of “tortilla” wraps for this recipe. Their wonderfully mild flavor and firm yet pliable texture make them an ideal and versatile canvas for the rich, savory enchilada filling.
- Cheeses: A generous and thoughtful blend of shredded Monterey Jack and sharp cheddar cheese is essential for imparting incredible creaminess, delightful texture, and a pleasant salty tang to the dish. These particular cheeses are chosen for their superior meltability, forming a golden, bubbly, and utterly irresistible topping during baking.
- Toppings: To complete this culinary masterpiece, fresh chopped cilantro is critical for providing a vibrant, herbaceous, and refreshing finish that beautifully cuts through the richness of the dish. A dollop of cool, tangy sour cream offers a perfect, creamy contrast to the robust flavors of the enchiladas. For an added flourish, feel free to incorporate thinly sliced jalapeños or creamy avocado as optional garnishes.
Step-by-Step Instructions for Assembling Your Keto Chicken Enchiladas
Follow these meticulously detailed steps to flawlessly create a show-stopping, low-carb Mexican dinner that will impress and delight everyone at your table:
1. Prepare the Flavorful Chicken Filling:
- Begin by preheating your oven to a precise and consistent 350°F (175°C). This ensures that your enchiladas will bake evenly, achieving that perfect internal temperature and golden exterior.
- In a large skillet positioned over medium heat on your stovetop, add one tablespoon of extra virgin olive oil. Allow the oil to gently heat until it begins to shimmer. Once hot, add the finely chopped onion to the skillet. Sauté the onion diligently for approximately 5 minutes, stirring it occasionally, until it transforms into a soft, translucent state and just begins to acquire a delicate brown hue around its edges, releasing its wonderfully sweet and pungent aroma.
- Now, stir in the minced garlic, a generous pinch of salt, a dash of black pepper, the fragrant ground cumin, and the warming chili powder. Continue to cook for another minute, allowing the spices to toast slightly and become aromatic. Next, incorporate the shredded chicken and precisely 1 cup of your chosen gluten-free enchilada sauce into the skillet. Mix all the ingredients thoroughly and gently until the chicken is completely coated with the flavorful sauce and heated through. Remove the skillet from the heat, making sure to reserve the remaining enchilada sauce for topping the enchiladas once they are assembled.
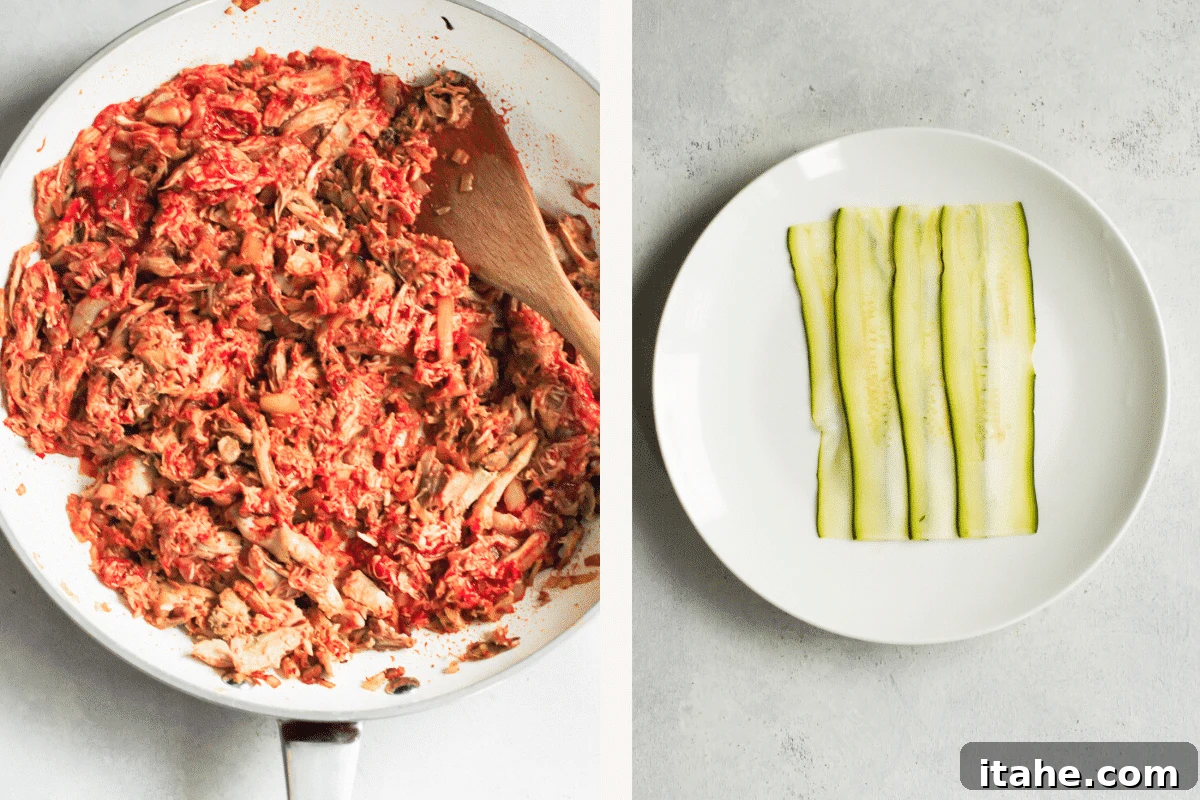
2. Slice and Artfully Arrange Zucchini “Tortillas”:
- Utilizing a “Y” shaped vegetable peeler or a precision mandoline slicer, carefully create long, uniformly thin, and even slices from your large zucchinis. The success of your enchiladas hinges on the thinness of these slices; the more delicate they are, the more pliable and flexible they will become, significantly easing the rolling process and preventing them from breaking.
- On a clean, flat surface such as a large plate or cutting board, lay out four of your thinly sliced zucchini pieces. Arrange them meticulously so that they slightly overlap one another. This overlapping technique is crucial as it forms a larger, more continuous, and ultimately sturdier “tortilla” surface, capable of securely holding the delicious filling.
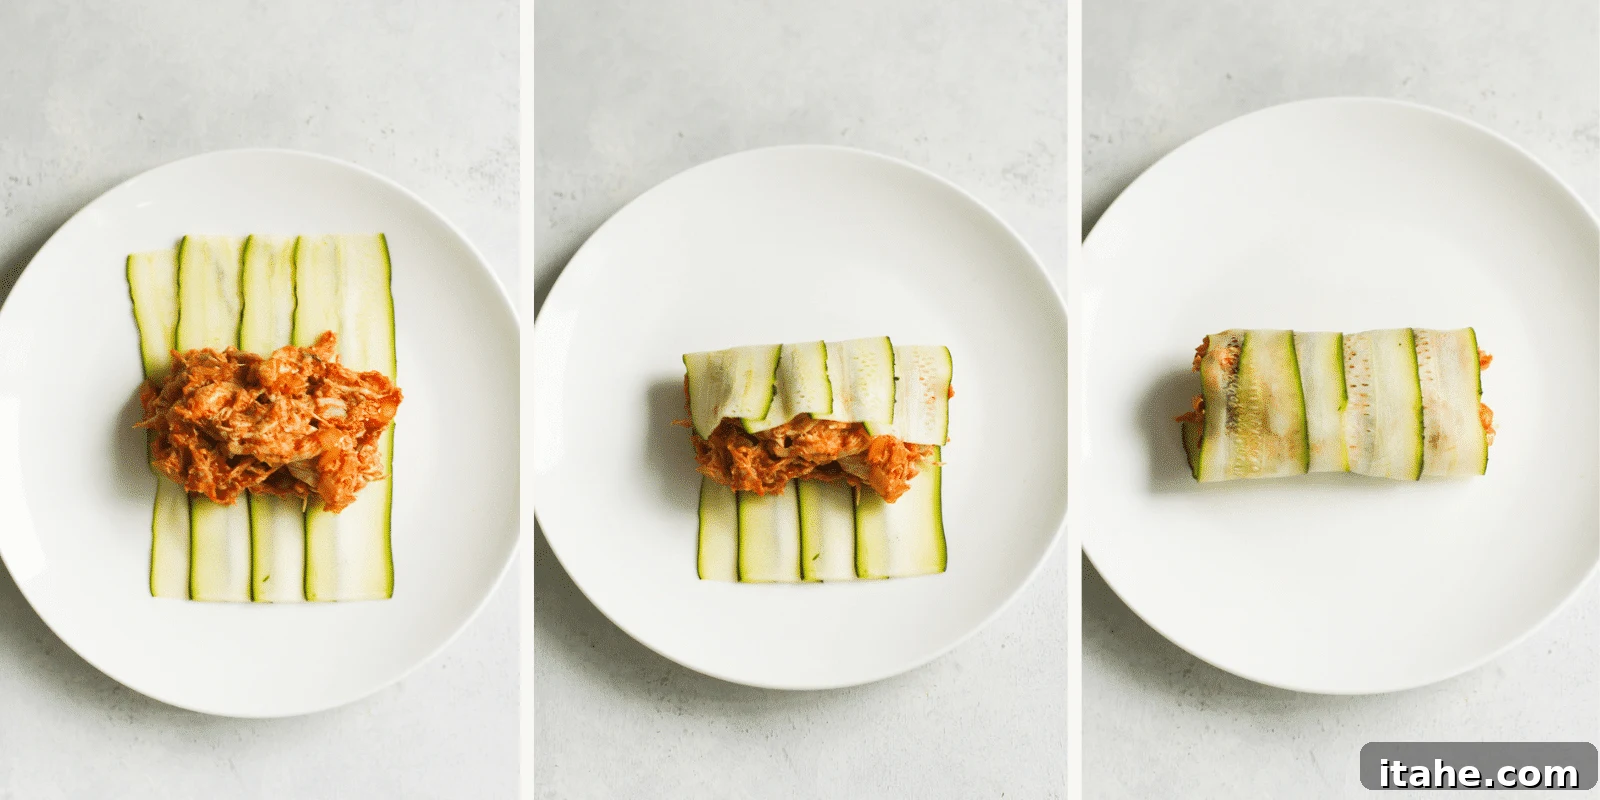
3. Roll Each Enchilada with Care and Precision:
- Carefully spoon approximately 2 tablespoons of the prepared chicken filling mixture onto one end of the artfully arranged and overlapping zucchini slices. Distribute the filling evenly across the entire width of the zucchini strips to ensure a balanced flavor in every bite.
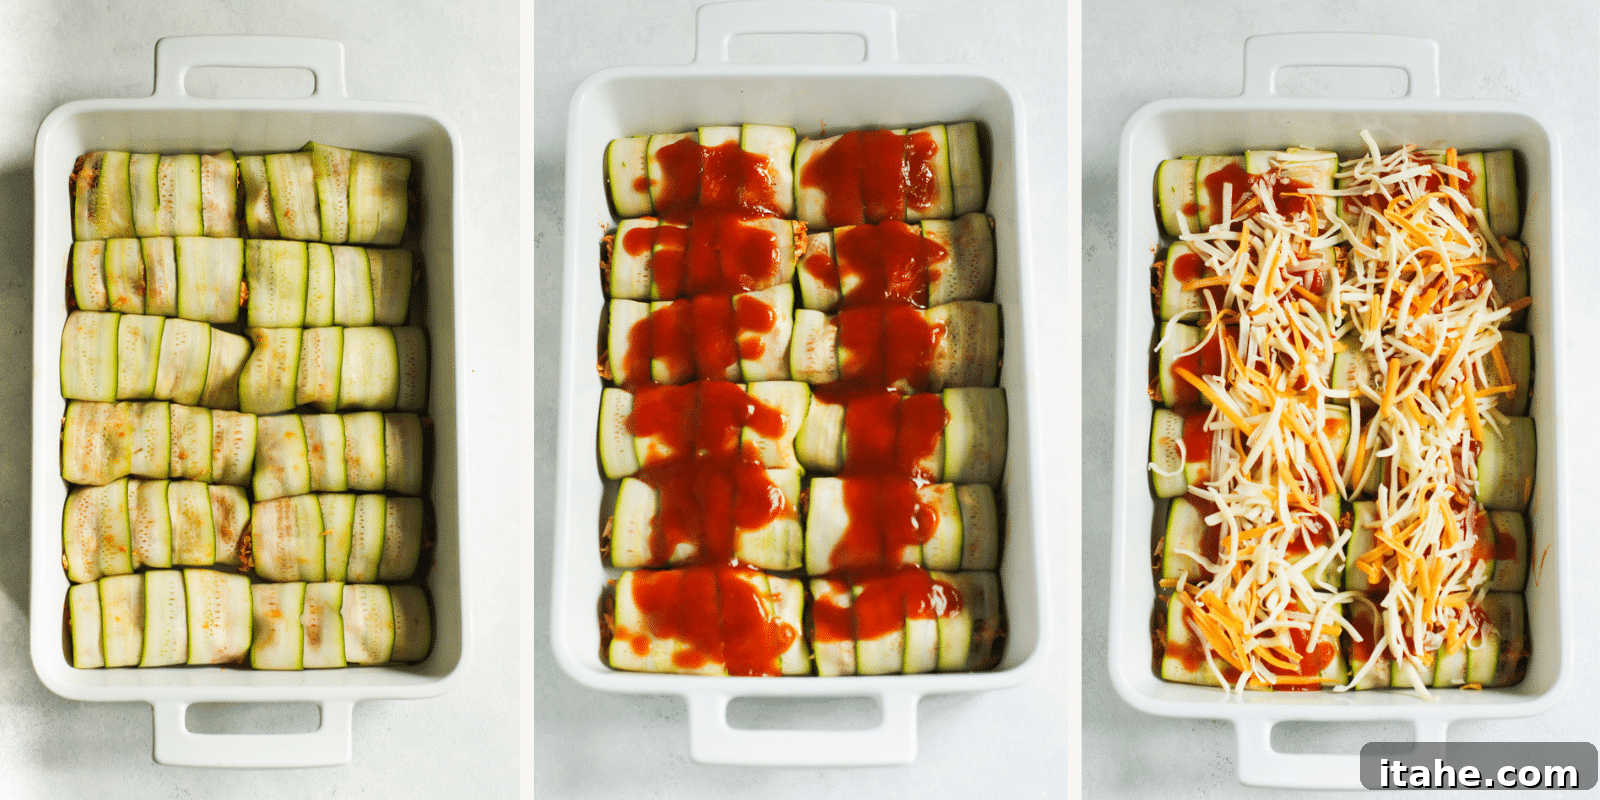
- Now, carefully but firmly begin to roll up the zucchini slices, encasing the savory filling securely within. The inherent thinness and pliability of the zucchini should facilitate an easy and smooth rolling process. As each enchilada roll is completed, gently transfer it to a large baking dish or casserole dish, ensuring it is placed seam-side down. This positioning is vital for preventing the rolls from unraveling during baking. Continue this process until all of the chicken filling and zucchini slices have been utilized, neatly arranging them in the dish.
4. Assemble and Bake to Golden Perfection:
- Once all your zucchini chicken rolls are meticulously lined up in the baking dish, generously pour the remaining enchilada sauce evenly over them. Ensure that each and every roll is thoroughly coated with the rich, vibrant sauce, promising maximum flavor.
- Next, evenly and liberally sprinkle the shredded Monterey Jack and sharp cheddar cheeses over the sauced enchiladas. This cheese layer will melt into a gloriously bubbly, golden crust.
- Carefully cover the casserole dish tightly with aluminum foil. Place the covered dish into your preheated oven and bake for approximately 15 minutes. The foil plays a crucial role here, helping to steam the zucchini to a perfect tenderness and to melt the cheese without allowing it to brown too rapidly or burn.
- After the initial 15 minutes, carefully remove the aluminum foil. Return the now uncovered casserole to the oven for an additional 5 minutes. This crucial final uncovered baking period allows the cheese topping to transform into a beautifully golden, irresistibly bubbly crust, and encourages the enchilada sauce to gently thicken and concentrate its flavors.
5. Serve Warm and Garnish with Freshness:
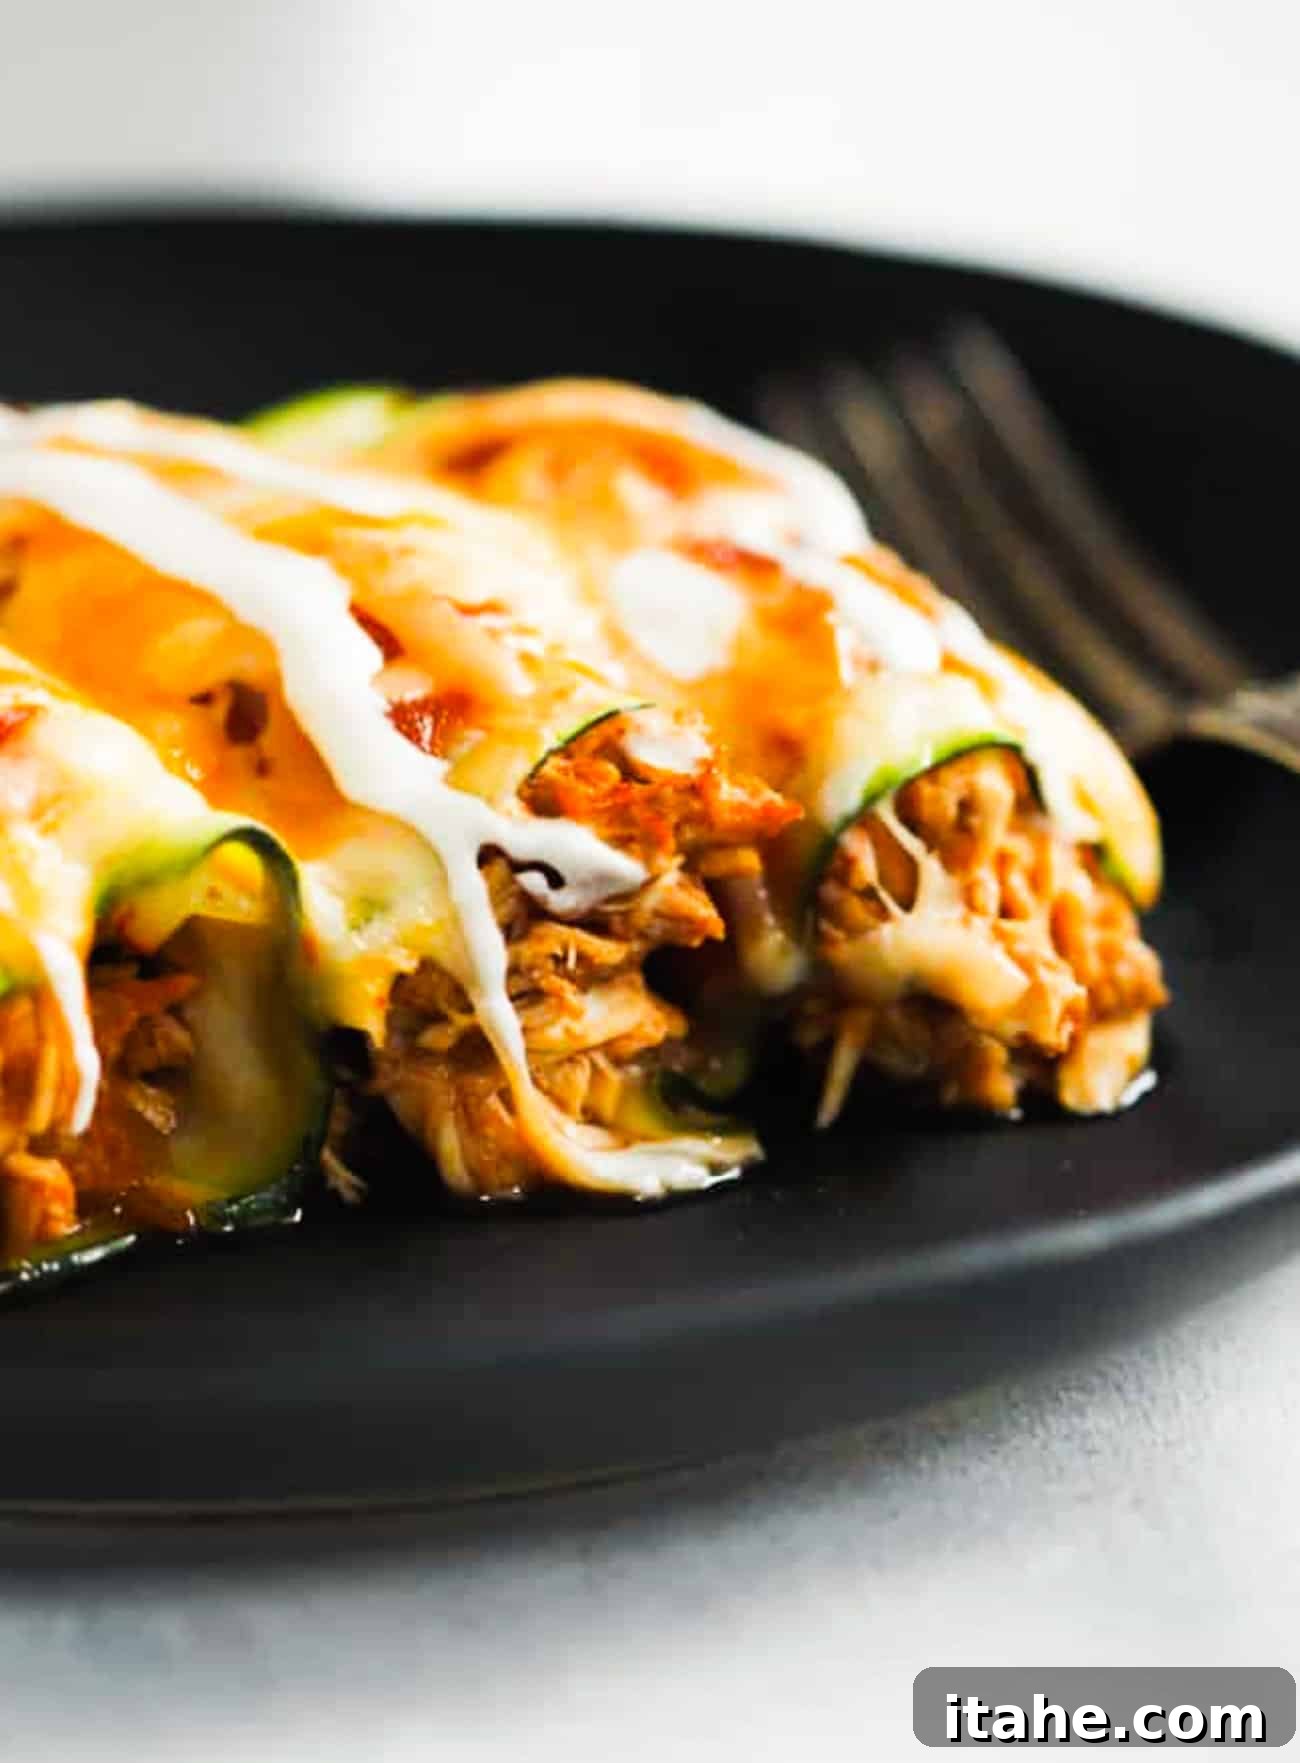
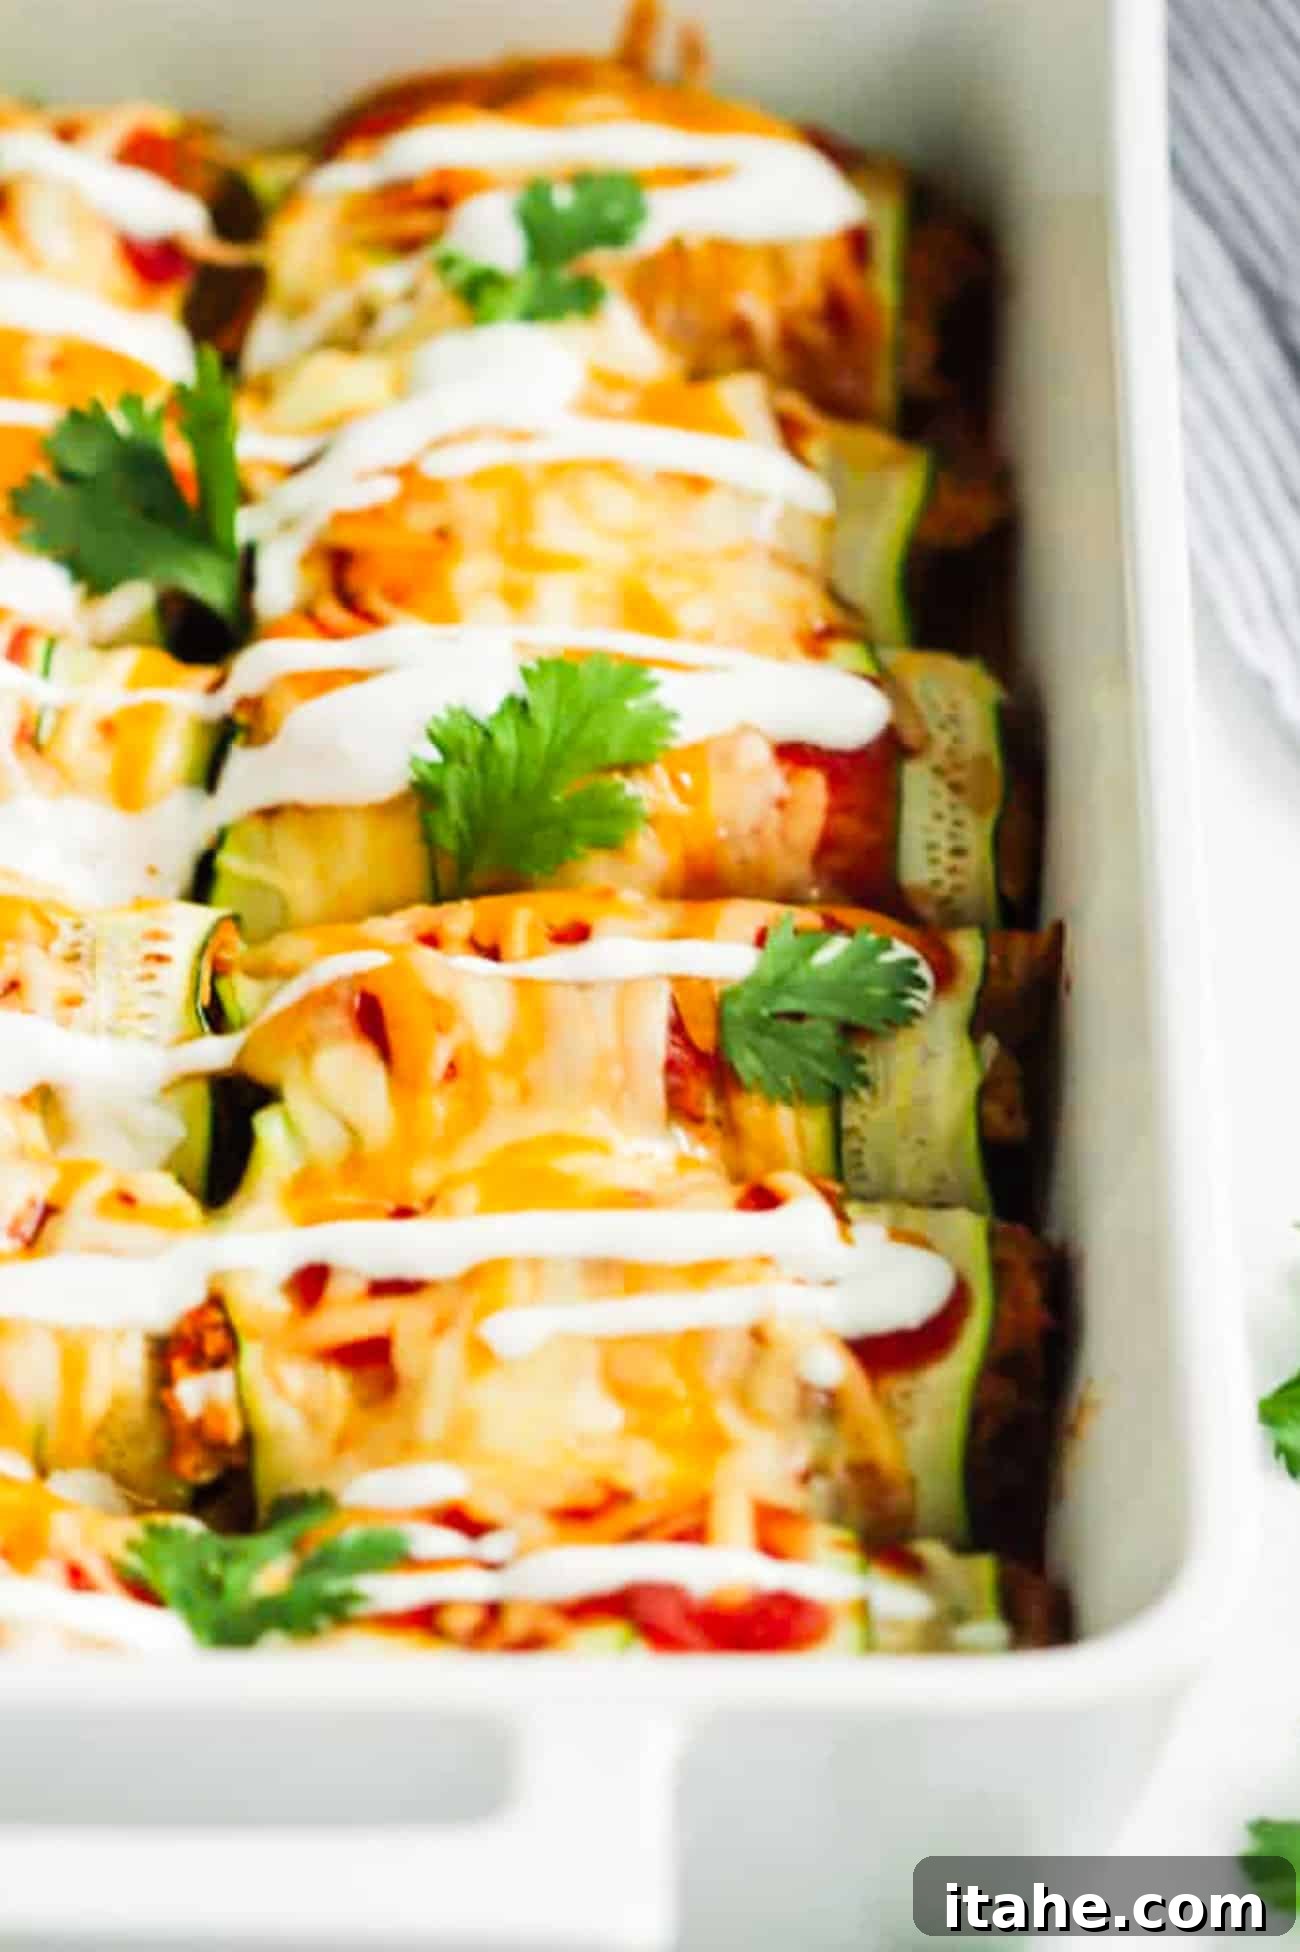
- Once your keto chicken enchiladas have baked to perfection, carefully remove the dish from the oven. Allow them to rest for a few precious minutes before serving; this short resting period helps the flavors meld and the dish to set slightly. The cheese should be gloriously melted and bubbling with a beautiful golden hue, and the sauce should be gently simmering.
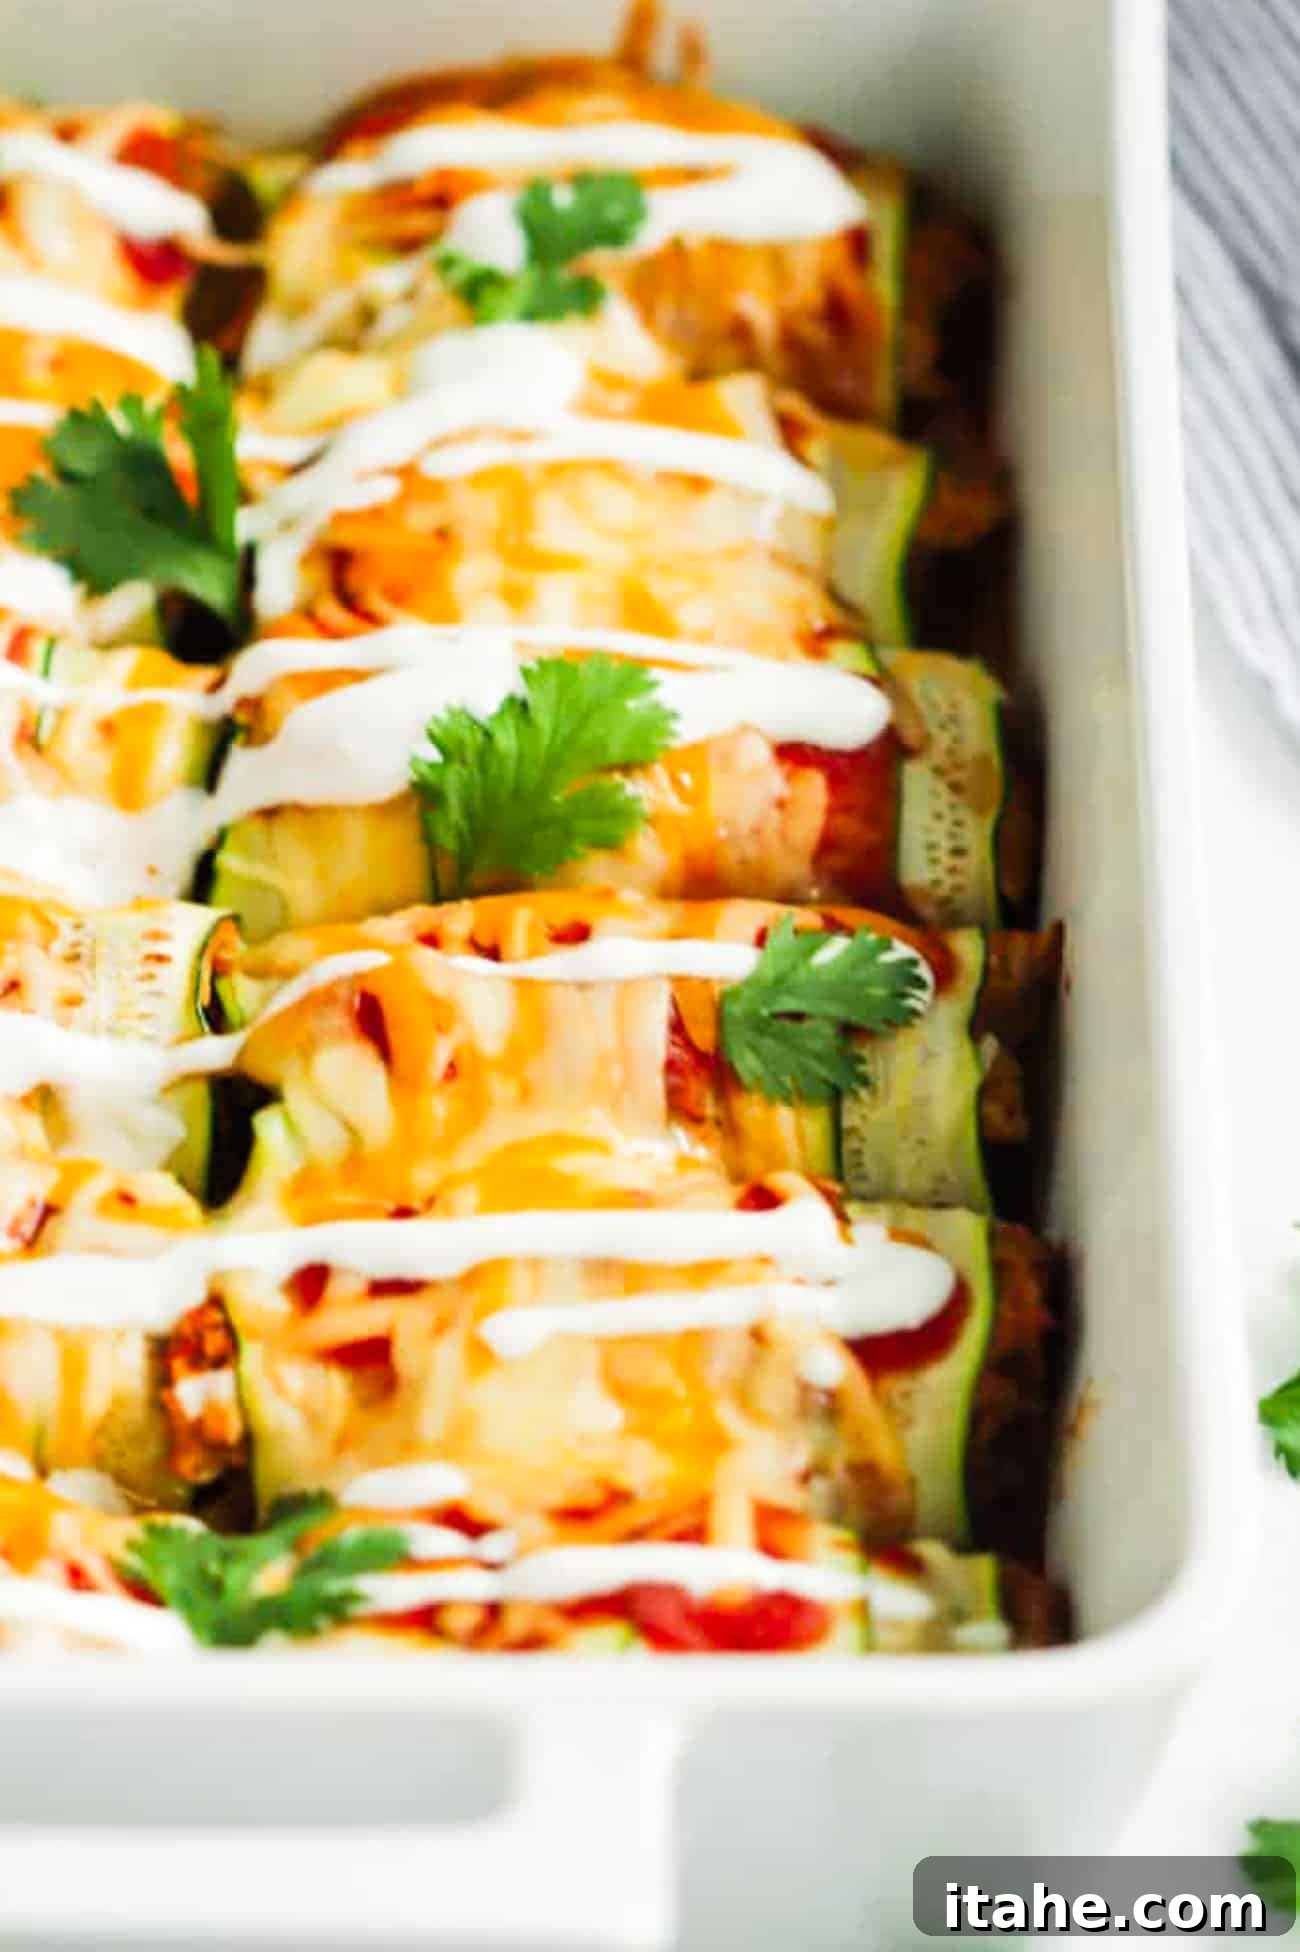
- To complete this culinary delight, garnish your piping hot enchilada casserole with a generous drizzle of cool, tangy sour cream. Follow this with a sprinkle of vibrant, freshly chopped cilantro. The fresh herbs and cool cream provide a delightful contrast in both flavor and texture, offering a refreshing counterpoint to the rich, savory flavors of the enchiladas. Serve immediately and savor every exquisite bite of this utterly delicious Mexican-inspired meal!
Pro Tips for Perfect Keto Enchiladas Every Time
- Cleverly Utilize Leftover Chicken: This recipe is an exceptionally ingenious and efficient way to repurpose any cooked chicken you might have lingering in your fridge. Whether it’s remnants from last night’s dinner or the succulent meat from a store-bought rotisserie chicken, simply shredding it directly into your enchilada filling will save you significant preparation time and actively contribute to reducing food waste.
- Precision Slicing is Non-Negotiable: As emphasized previously, investing in and utilizing a “Y” peeler or a mandoline slicer is not just a recommendation but an absolute necessity for achieving uniformly thin, delicate zucchini slices. Attempting to use a conventional kitchen knife will almost certainly result in slices that are either too thick or uneven, making them highly susceptible to tearing and breaking during the crucial rolling process. Employ the right tool for optimal results.
- Pay Close Attention to Zucchini Thickness: The ideal zucchini slice should possess a remarkable thinness that allows it to be incredibly flexible, enabling it to bend and roll effortlessly without any resistance or breakage. If your slices err on the side of being too thick, they will struggle to properly encase the filling and, more importantly, will retain a texture that feels more like cooked zucchini than a soft, pliable tortilla. Always perform a quick test by attempting to roll a couple of slices before committing to slicing all of your zucchini, adjusting your technique or tool if necessary.
- Mastering Moisture Control: Zucchini, by its very nature, boasts a high water content, which, if left unchecked, can lead to a watery or soggy final enchilada dish. To proactively combat this, always keep a stack of paper towels readily accessible. If your sliced zucchini appears overly moist or feels particularly slippery, gently lay them out and pat them down with the paper towels to absorb any excess liquid. This simple yet effective step not only ensures your rolls are far easier to handle during assembly but also guarantees that your finished dish will boast a superior, firmer consistency.
- Elevate Your Enchilada Sauce: While the convenience of a good quality store-bought gluten-free enchilada sauce is undeniable, consider a simple trick to deepen and enhance its flavor profile. Stirring in a mere dash of apple cider vinegar can introduce a subtle tang, or a tiny pinch of unsweetened cocoa powder can add an unexpected layer of earthy complexity, both of which skillfully mimic the nuanced flavors found in traditional, slow-cooked Mexican sauces.
- Experiment with Cheese Varieties: For those seeking an extra layer of luxurious richness or a distinct gourmet touch, do not hesitate to explore beyond the classic Monterey Jack and cheddar. Experiment with other keto-friendly melting cheeses such as authentic Oaxaca cheese, a creamy blend of smoked gouda and mozzarella, or even a spicy pepper jack. The key is to select cheeses known for their excellent meltability to achieve that quintessential gooey, bubbly enchilada experience that is utterly irresistible.
Storing and Reheating Your Low-Carb Enchiladas
Ensuring proper storage and reheating techniques will allow you to savor these incredibly delicious keto chicken enchiladas for several days, making them an excellent candidate for convenient meal prep.
To Store: Once your enchiladas have cooled completely to room temperature, which is essential to prevent condensation, carefully transfer any remaining portions into an airtight container. Store this container in the refrigerator, where the enchiladas will remain fresh and flavorful for up to 4 days. This makes them perfectly suited for preparing healthy lunches or dinners in advance, saving you time and effort throughout the week.
To Freeze: Due to the naturally high water content present in zucchini, it has a tendency to become quite mushy and unfortunately lose its desirable firm yet tender texture once it undergoes the freezing and subsequent thawing process. Therefore, for optimal quality and texture, freezing these particular enchiladas is generally not recommended. However, if circumstances necessitate freezing, please be aware that the zucchini “tortillas” will most likely be significantly softer and less firm upon reheating compared to their freshly baked state. To minimize this effect, consider freezing individual portions in a single layer before transferring them to a larger freezer-safe bag.
To Reheat: For a quick and easy reheating method, individual portions of the enchiladas can be gently warmed in the microwave. Start with about 1-2 minutes on high power, and then continue in 30-second intervals until they are heated thoroughly to your satisfaction. For larger portions or if you desire a crispier topping and more uniform heating, particularly if the cheese has lost its initial crispness, place the enchiladas in a preheated 300°F (150°C) oven. Loosely cover the dish with aluminum foil to prevent the enchiladas from drying out, and bake for approximately 10-15 minutes, or until they are completely warmed through and the sauce is gently bubbling. If you prefer to achieve a slightly crispier, golden-brown cheese topping, simply remove the foil for the final few minutes of reheating.
Explore More Delicious Keto Zucchini Recipes
Zucchini truly shines as an incredibly versatile and adaptable vegetable, particularly within the framework of keto cooking. Its mild flavor and firm texture make it an outstanding low-carb alternative in a multitude of dishes, seamlessly replacing higher-carb ingredients. If you’ve fallen in love with these savory keto chicken enchiladas, you’ll undoubtedly be thrilled to discover and try these other equally fantastic and creative zucchini-based recipes:
- Spinach and Zucchini Lasagna: This delightful recipe ingeniously reimagines classic lasagna, transforming it into a vibrant vegetarian, satisfyingly low-carb, and completely gluten-free culinary masterpiece. It meticulously layers rich, homemade tomato sauce with creamy, skinny ricotta, savory mozzarella, and delicate zucchini noodles, offering a remarkably fresh, lighter, and healthier take on a beloved Italian comfort food that doesn’t skimp on flavor.
- 5-Ingredient Chicken Zucchini Boats: For those busy days when time is of the essence, these quick and remarkably easy zucchini boats are an absolutely brilliant and resourceful way to utilize any leftover cooked chicken. The preparation is straightforward: simply hollow out fresh zucchinis, fill them generously with a perfectly seasoned chicken mixture, and bake until tender and golden. The result is a wholesome, incredibly satisfying, and nutrient-packed meal that comes together in an impressively short amount of time.
- 4-Ingredient Chicken Zucchini Rolls: Offering an even simpler yet equally delicious and elegant option, these chicken zucchini rolls are a fantastic choice for a fuss-free dinner. Requiring just four core ingredients, you can effortlessly whip up a flavorful, healthy, and visually appealing meal that the entire family will wholeheartedly enjoy. This recipe beautifully demonstrates that healthy eating can indeed be both incredibly convenient and profoundly gratifying.
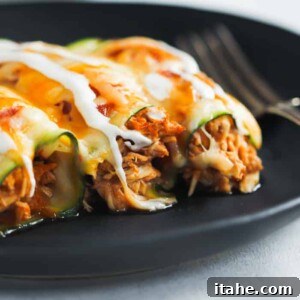
Keto Chicken Enchiladas
Olivia Ribas
12 people
15 minutes
25 minutes
40 minutes
Video
Ingredients
- 1 tablespoon extra virgin olive oil (or avocado oil)
- 1 large white onion, chopped
- Salt and black pepper, to taste
- 2 cloves garlic, minced
- 1 teaspoon ground cumin
- 2 teaspoons chili powder
- 3 cups shredded chicken (pre-cooked)
- 1⅓ cups red enchilada sauce, divided
- 4 large zucchini, sliced thinly with a mandoline or peeler
- 1 cup Monterey Jack cheese, shredded
- 1 cup cheddar cheese, shredded
- Sour cream, for drizzling
- Fresh cilantro leaves, for garnishing
Instructions
- Preheat oven to 350ºF (175°C).
- In a large skillet over medium heat, add olive oil. Once hot, add diced onion and sauté until golden and brown, about 5 minutes.
- Add the salt, pepper, minced garlic, cumin, chili powder, shredded chicken, and 1 cup of enchilada sauce to the skillet. Stir well until all ingredients are combined and heated through.
- Using a vegetable peeler or mandoline, make thin slices of zucchini. On a cutting board, lay out 4 zucchini slices slightly overlapping to form a larger wrap.
- Add about 2 tablespoons of the chicken mixture on top of the zucchini slices. Roll up the zucchini with the filling and transfer carefully to a baking dish, seam-side down. Repeat with the remaining zucchini and chicken mixture.
- Pour the remaining enchilada sauce over the zucchini enchiladas in the baking dish. Then, evenly sprinkle the shredded Monterey Jack and cheddar cheeses over the sauce.
- Cover the casserole dish with foil. Bake for approximately 15 minutes. Uncover the casserole and bake for an additional 5 minutes, or until the cheese is bubbly and golden.
- Garnish with a drizzle of sour cream and fresh cilantro leaves before serving warm. Enjoy!
Notes
- This recipe was adapted from the site Delish.
- Leftover Chicken: Shred and use any leftover cooked chicken for your filling to save time.
- Zucchini Slicing: For best results, use a “Y” peeler or mandoline to achieve thin, even slices. A knife will not provide the necessary thinness.
- Avoid Breakage: If zucchini slices are too thick, they will break when you try to roll them. Ensure they are super thin.
- Moisture Control: If zucchini slices feel slippery or overly moist, pat them dry with paper towels for easier handling and to prevent a watery dish.
Nutrition
Nutrition information is an approximation and may vary based on specific ingredients and preparation.