
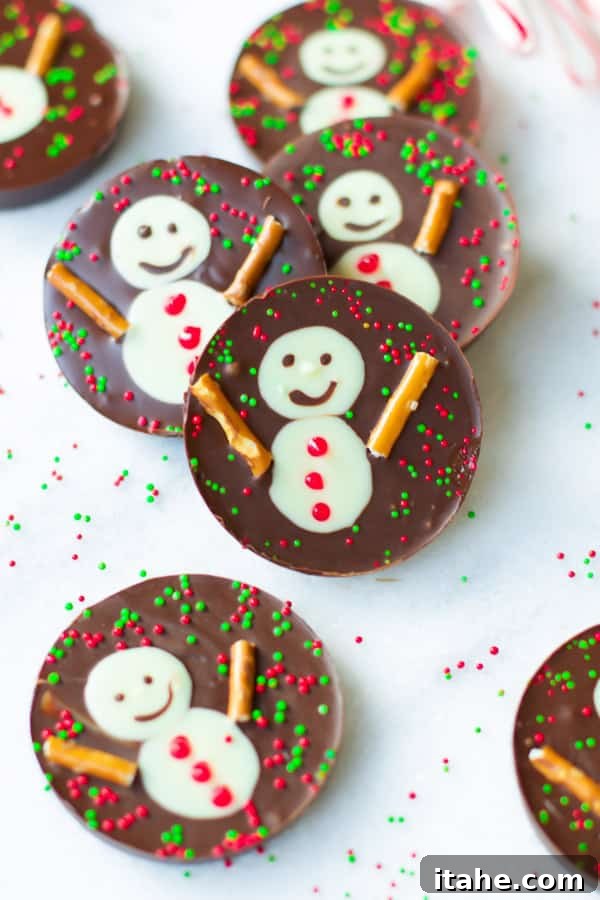
Delightful No-Bake Snowman Chocolate Cups: Your Ultimate Holiday Treat Guide
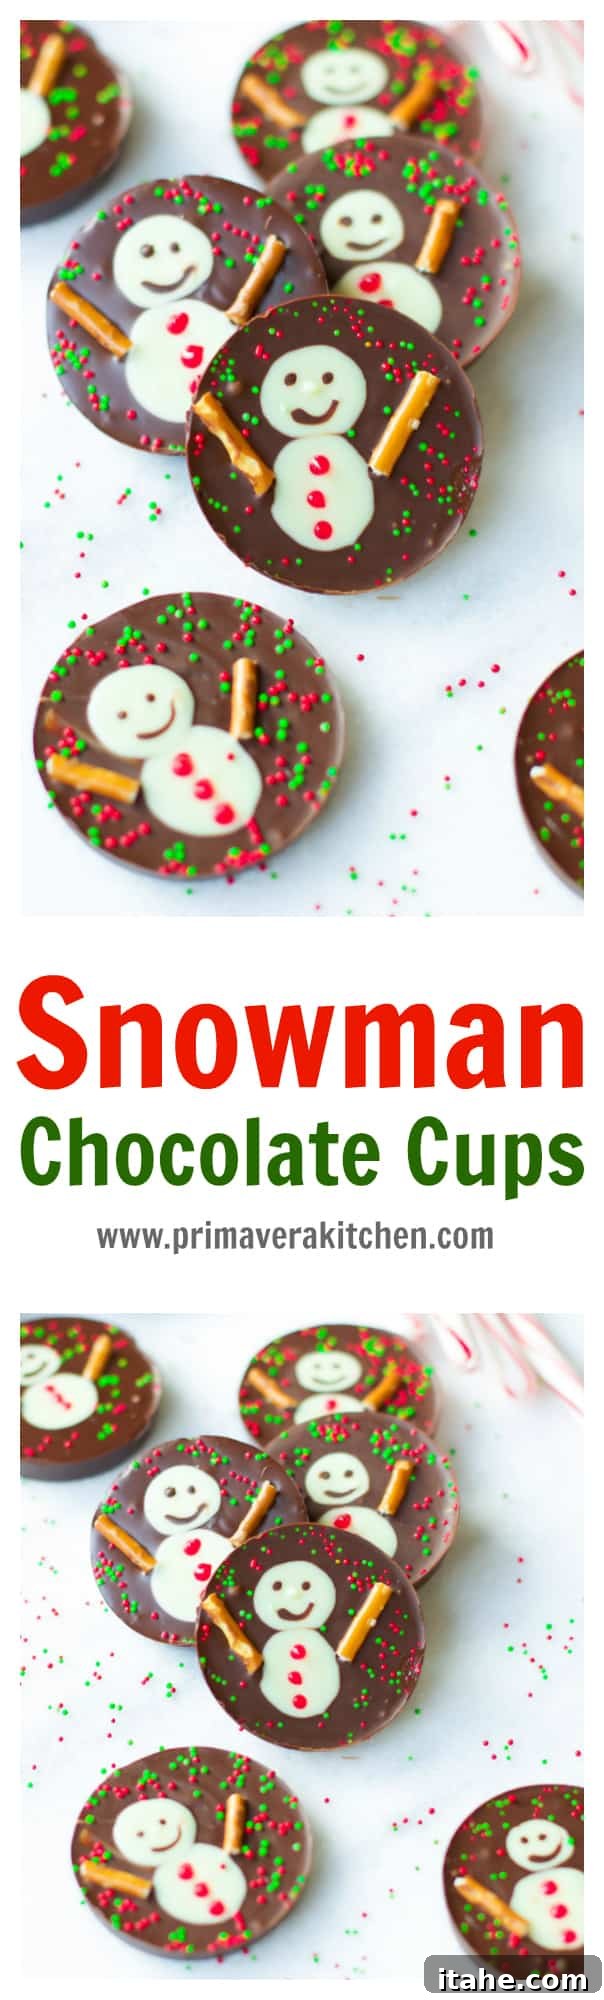
Get ready to infuse your holiday season with an irresistible blend of charm and deliciousness! These Snowman Chocolate Cups are more than just a dessert; they are miniature works of edible art, designed to bring smiles and festive cheer to everyone who tries them. Perfect for Christmas parties, cozy winter evenings, or as a thoughtful homemade gift, these delightful treats require no baking whatsoever, making them an incredibly easy and fun project for all ages. Crafted with just a handful of simple ingredients, they promise maximum impact with minimal effort.
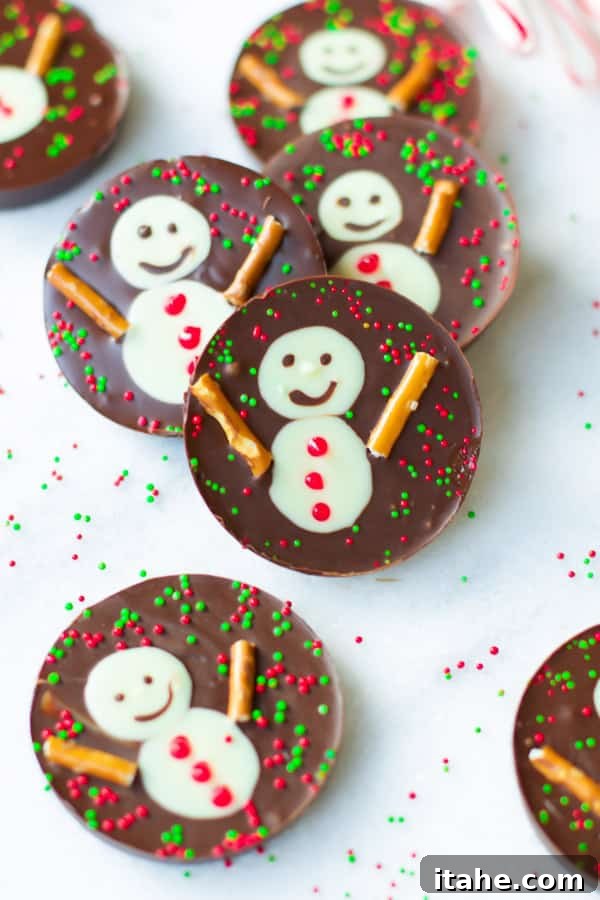
Why You’ll Adore These Easy Snowman Chocolate Cups
The holiday season is a time for joy, celebration, and, of course, delicious food. But who says holiday treats have to be complicated? Our Snowman Chocolate Cups embody everything wonderful about festive confections: they’re adorable, incredibly simple to make, and utterly delicious. Here’s why these no-bake wonders will become your new favorite:
- Effortlessly Easy & No-Bake: Forget preheating ovens and complex techniques. These chocolate cups come together quickly with just melting and assembly, making them perfect for even the busiest holiday schedules.
- Kid-Friendly Fun: Little hands will love helping to decorate these cute snowmen. It’s a fantastic activity for family bonding and creating cherished holiday memories in the kitchen. Drawing the faces and adding sprinkles is pure joy for kids!
- Charming & Festive Aesthetic: Their snowman design is inherently cheerful and perfectly captures the magic of winter. They instantly elevate any dessert platter or gift box.
- Minimal Ingredients: You only need a few staple ingredients to create these impressive treats, most of which you might already have in your pantry.
- Versatile for Any Occasion: While they scream “Christmas,” these snowman cups are delightful throughout the entire winter season. Serve them at holiday gatherings, school parties, or enjoy them as a sweet snack.
- Wonderful Edible Gifts: Package them in small bags or decorative boxes, and you’ve got a homemade gift that’s sure to impress friends, family, and neighbors.
These chocolate cups are not just a recipe; they’re an invitation to embrace the joyful spirit of the holidays with ease and creativity. Get ready to melt some chocolate and build some adorable snowmen!
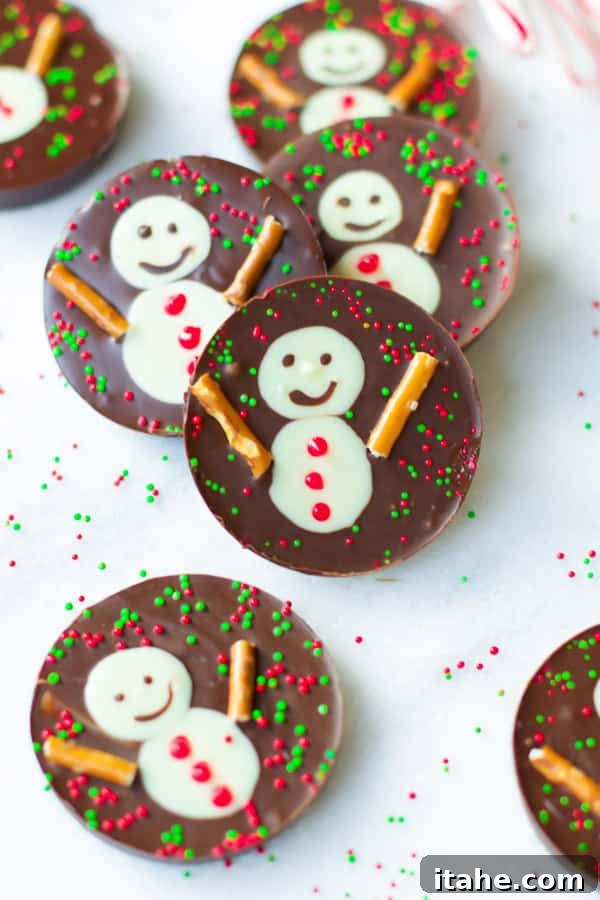
Unlocking the Magic: Ingredients Spotlight
Creating these enchanting Snowman Chocolate Cups is a delightful journey, and it all begins with selecting the right ingredients. The beauty of this recipe lies in its simplicity, relying on a few key components to deliver maximum flavor and visual appeal.
- Dark Chocolate Chips: The foundation of our chocolate cups. Choosing a high-quality dark chocolate is paramount as it forms the bulk of the treat and dictates its overall taste. A good dark chocolate provides a rich, complex flavor that isn’t overly sweet, balancing beautifully with the other elements. Look for chocolate chips or baking bars with at least 60% cocoa for the best results. The better the chocolate, the more luxurious your snowman cups will taste.
- White Chocolate Chips: Essential for creating the iconic snowman bodies. White chocolate offers a creamy contrast to the dark chocolate and provides a bright canvas for decoration. Like dark chocolate, opt for a good quality white chocolate for smooth melting and a lovely flavor.
- Pretzel Sticks: These aren’t just for crunch; they cleverly serve as the snowman’s “arms,” adding a whimsical touch and a delightful salty contrast to the sweet chocolate. Cutting them in half makes them the perfect size.
- Christmas Sprinkles: The festive touch! Sprinkles add bursts of color and a playful texture, making your snowmen truly sparkle. Choose a mix of red, green, and white sprinkles to enhance the holiday theme.
- Red Sparkle Gel: This is your secret weapon for those tiny, vibrant details, like the snowman’s buttons or a carrot nose. It’s easy to apply and dries quickly, giving your snowmen a polished look.
- Black Sparkle Gel (Optional, but Recommended): While you can use melted dark chocolate in a snipped plastic bag for the eyes and mouth, black sparkle gel offers a quicker, cleaner, and less daunting alternative. It significantly simplifies the detailing process, making it perfect for beginners or when crafting with kids. If you opt for melted chocolate, remember the “tiny hole” rule!
Gathering these simple yet impactful ingredients is the first step towards creating a batch of Snowman Chocolate Cups that are as joyful to look at as they are to eat.
Essential Equipment for Your Snowman Creation
You don’t need a professional pastry kitchen to make these adorable treats. A few basic items from your kitchen will do the trick:
- Silicone Muffin Pan or Muffin Tin with Cupcake Liners: Silicone pans are ideal for easy removal, but a standard muffin tin lined with paper or foil cupcake liners works just as well.
- Heat-Proof Medium and Small Bowls: For melting your dark and white chocolate safely in the microwave.
- Spatula or Spoon: For stirring the melting chocolate.
- Resealable Plastic Bags (Small Ziploc Bags): These are key for piping the white chocolate snowman bodies and the detailed faces. The smaller the better for precision!
- Scissors: For snipping tiny holes in the corners of your plastic bags.
- Small Plates or Baking Sheet: For chilling the finished chocolate cups in the fridge.
Snowman Chocolate Cups: The Full Recipe
Snowman Chocolate Cups
Ingredients
- 2 cups dark chocolate chips
- 1/2 cup white chocolate chips
- 6 pretzel sticks cut in half
- 1/4 cup Christmas sprinkles
- Red sparkle gel
- Black sparkle gel (optional: can use a snipped plastic bag with melted dark chocolate instead for eyes and mouth)
Instructions
-
In a heat-proof medium bowl, melt the dark chocolate chips in the microwave. Heat in 20-second intervals, stirring well after each interval, until the chocolate is fully melted and smooth. Be careful not to overheat.
-
Spoon about two tablespoons of the melted dark chocolate into a small resealable plastic bag. This will be used for detailing the snowman faces later. Set aside.
-
In another heat-proof small bowl, melt the white chocolate chips in the microwave. Stir every 20 seconds until completely melted and creamy.
-
Transfer all the melted white chocolate into a separate small resealable plastic bag. This will be used for the snowman bodies. Set aside.
-
Pour the remaining melted dark chocolate into the cavities of a silicone muffin pan. If using a regular muffin tin, ensure it’s lined with cupcake liners. Fill each cavity about halfway or to your desired chocolate cup thickness.
-
Carefully snip a very tiny corner off the plastic bag containing the melted white chocolate. The smaller the hole, the more control you’ll have.
-
While the dark chocolate in the muffin pan is still warm and liquid (this helps the white chocolate adhere), pipe two small circles of white chocolate into each dark chocolate cup to form the snowman’s body and head.
-
Now for the faces! If using the reserved melted dark chocolate, snip an even tinier corner off that plastic bag. Carefully draw small dots for eyes and a tiny smile for the mouth on each snowman. Alternatively, use black sparkle gel for ease and precision.
-
Add the pretzel stick arms by gently inserting two halves into the sides of each snowman, just below the head.
-
Using the red sparkle gel, add small dots for buttons down the snowman’s body, and a tiny triangle for a carrot nose on the face.
-
Generously sprinkle Christmas sprinkles around the base of the snowman and on the dark chocolate, creating a festive, snowy ground effect.
-
Place the muffin pan in the fridge and chill for at least 10-15 minutes, or until the chocolate is completely set and firm.
Notes
- Adapted from The Decorated Cookie.
- When melting chocolate, ensure your bowls are completely dry. Any water can cause the chocolate to seize and become unusable.
- If you don’t have chocolate chips, good quality chocolate baking bars can be chopped and melted.
- Always choose a very good quality dark chocolate. As the main ingredient, its flavor profile will significantly impact the deliciousness of your chocolate cups.
- To store: Keep the Snowman Chocolate Cups covered in an airtight container in the fridge for up to 5 days. For best taste and texture, allow them to come to room temperature for a few minutes before serving.
Nutrition
Nutrition information is automatically calculated, so should only be used as an approximation.
Tips for Perfecting Your Snowman Chocolate Cups
While this recipe is incredibly simple, a few expert tips can ensure your Snowman Chocolate Cups turn out perfectly every time, looking professionally crafted and tasting absolutely divine:
- Quality Chocolate Matters: This cannot be stressed enough. Since chocolate is the star ingredient, investing in good quality dark chocolate (and white chocolate) will make a noticeable difference in flavor and texture. High-quality chocolate melts more smoothly and sets with a better snap.
- Melting Chocolate Safely: The key to smooth, workable chocolate is gentle melting. The microwave method is quick but requires attention. Always use short bursts (20 seconds), stirring thoroughly in between. Residual heat will continue to melt the chocolate. Overheating can cause chocolate to burn or seize, becoming grainy and unusable.
- The “Tiny Snip” Rule: When preparing your plastic bags for piping, snip the very, very smallest corner off. You can always make the hole larger if needed, but you can’t make it smaller. This precision is crucial for drawing delicate snowman faces without blobs. For those less confident with piping, remember the black sparkle gel is an excellent alternative.
- Work While Chocolate is Warm: For the white chocolate snowman bodies to adhere well to the dark chocolate base, ensure the dark chocolate is still liquid or slightly warm when you pipe the white chocolate on top. This helps them fuse seamlessly as they set.
- Creative Customization: Don’t limit yourself to the suggested decorations! You can add mini chocolate chips for eyes, small candy orange pieces for noses, or even different colored sparkle gels for scarves or hats. Let your creativity shine!
- Prevent Sticking: If you’re not using a silicone muffin pan, ensure your cupcake liners are good quality and fit snugly. You can also lightly grease the liners with a flavorless oil spray before adding the dark chocolate, though typically, a good quality liner won’t stick.
- Patience with Chilling: Resist the urge to rush the chilling process. A full 10-15 minutes in the fridge ensures the chocolate is completely set, allowing for easy removal and preventing smudges on your adorable snowmen.
- Temperature Control for Serving: While these treats are stored in the fridge, allowing them to sit at room temperature for 5-10 minutes before serving can enhance their flavor and texture, making the chocolate slightly softer and more melt-in-your-mouth.
Variations & Customizations
These Snowman Chocolate Cups are a delightful canvas for creativity. Here are a few ideas to customize them:
- Chocolate Base Alternatives: Instead of dark chocolate, try milk chocolate for a sweeter profile, or semi-sweet for a milder option. You could even use a layer of white chocolate as the base and dark chocolate for the snowman details for a reverse look!
- Topping Adventures: Beyond Christmas sprinkles, consider edible glitter, finely crushed peppermints, mini M&Ms, or even a dusting of cocoa powder around the snowman.
- Flavor Boosts: Add a tiny drop of peppermint extract, almond extract, or orange zest to your melted dark chocolate for an extra layer of flavor. Ensure the extracts are oil-based to prevent chocolate seizing.
- Hat & Scarf Details: Use small pieces of fruit leather or colored fondant to create tiny scarves or hats for your snowmen.
- Nutty Crunch: Sprinkle finely chopped nuts (like pecans or almonds) into the dark chocolate base before it sets for a delightful crunch.
Serving & Gifting Your Festive Treats
These Snowman Chocolate Cups are as versatile in presentation as they are easy to make. When serving, arrange them on a festive platter alongside other holiday cookies and treats. Their charming appearance makes them a natural centerpiece for your dessert table. For gifting, place individual cups in cellophane bags tied with a ribbon, or arrange a small assortment in a decorative box. They make thoughtful hostess gifts, party favors, or a sweet gesture for teachers and colleagues.
Frequently Asked Questions About Snowman Chocolate Cups
Here are some common questions you might have when making these festive treats:
Q: Can I use different types of chocolate for the base?
A: Absolutely! While dark chocolate offers a lovely contrast, you can use milk chocolate, semi-sweet chocolate, or even a flavored chocolate for the base. Just ensure it’s good quality baking chocolate for best results.
Q: How long do these Snowman Chocolate Cups last?
A: When stored in an airtight container in the fridge, they will stay fresh for up to 5 days. For optimal taste and texture, consume them within 3-4 days.
Q: Can I make these ahead of time for a party?
A: Yes, they are perfect for making in advance! Prepare them a day or two before your event and store them in the refrigerator. This frees up your time on the day of the celebration.
Q: What if I don’t have pretzel sticks?
A: You can get creative! Small candy canes (broken into pieces), thin strips of dried fruit, or even tiny chocolate wafer sticks can work as alternative snowman arms.
Q: My chocolate seized while melting. What went wrong?
A: Chocolate seizes when even a tiny drop of water gets into it, or if it’s overheated too quickly. Ensure your bowls and utensils are perfectly dry. When melting in the microwave, use low power and stir frequently, heating in short bursts.
Q: Can I freeze these chocolate cups?
A: While technically possible, freezing chocolate can sometimes lead to a dull finish or a slightly altered texture. If you must freeze, wrap them very tightly in plastic wrap and then foil to prevent freezer burn, and thaw slowly in the fridge. They are best fresh from the fridge.
Q: How can I make these even more kid-friendly?
A: Let kids take charge of the decorating! Provide various sprinkles, mini candies, and the sparkle gels for them to unleash their creativity. You can do the melting and initial pouring, then hand over the fun part.
More Irresistible Christmas Treats to Explore
No holiday gathering is complete without a delightful spread of sweet treats. If you’re looking to expand your festive baking (or no-baking!) repertoire, here are some other fantastic recipes that pair beautifully with our Snowman Chocolate Cups. These recipes are perfect for guests, gifting, or simply enjoying with your loved ones during the most wonderful time of the year.
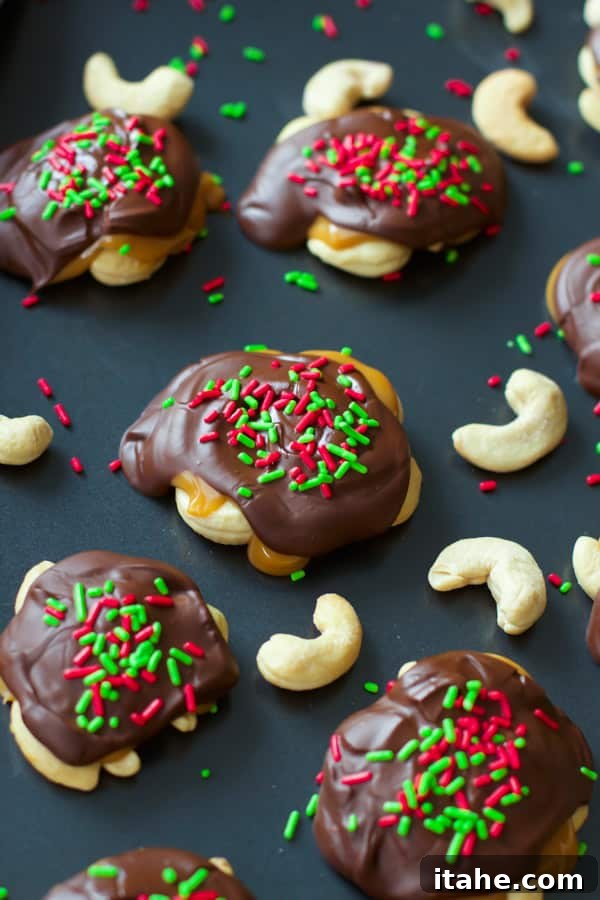
Indulge in the rich, caramel-like sweetness of dulce de leche paired with crunchy cashews and decadent chocolate. These no-bake turtles are an elegant yet simple addition to any holiday platter.
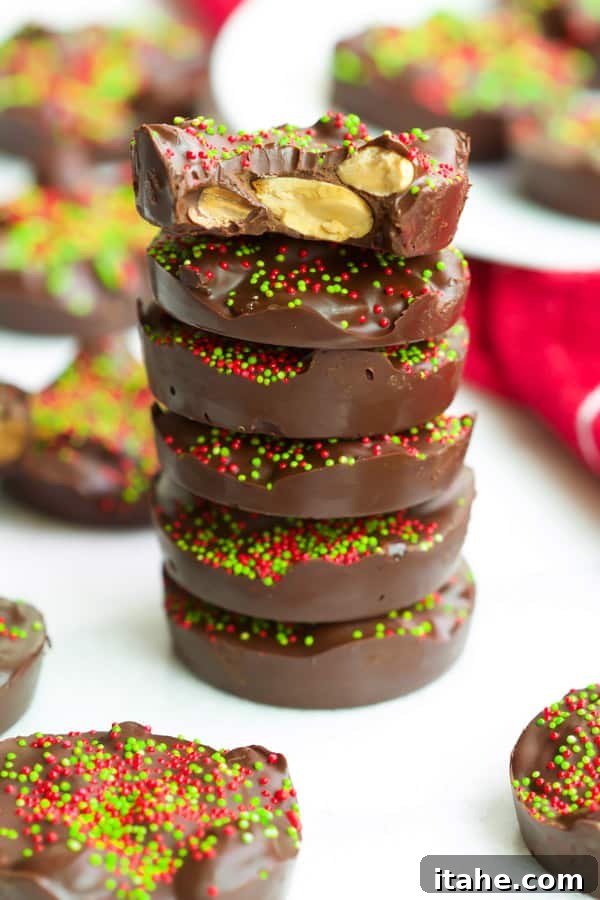
If you love the combination of almonds and chocolate, these cups are a must-try. Featuring a delightful nutty crunch within a smooth chocolate shell, they offer a sophisticated flavor that’s still incredibly easy to prepare.
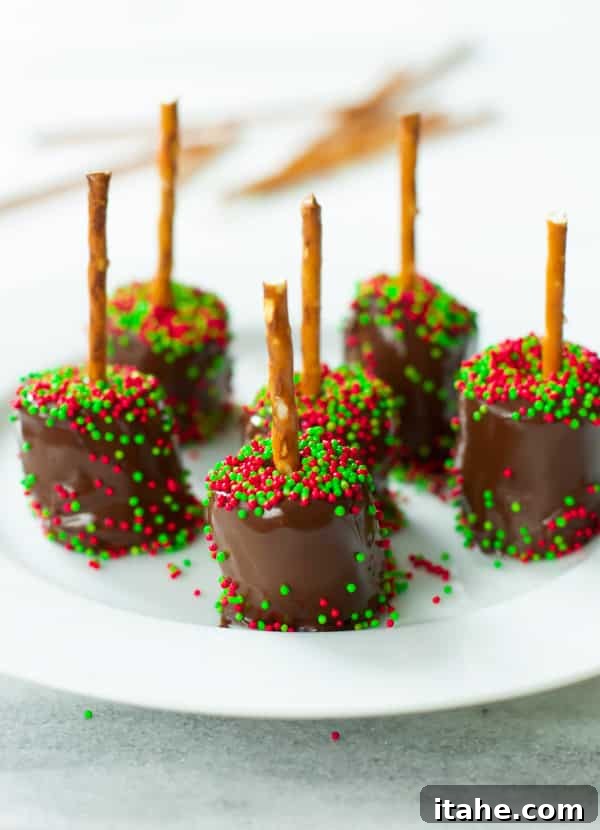
Looking for a lighter, fruit-based option? These chocolate-covered banana treats are surprisingly simple and incredibly satisfying. With just four ingredients, they’re a quick and relatively healthier alternative for your holiday spread.
And of course, for savory bites alongside your sweets, don’t forget this festive Holiday Cheese Board. Because a truly memorable party includes a variety of flavors and textures for all to enjoy!
Conclusion: Sweet Memories, Easy Creations
These Snowman Chocolate Cups are more than just a treat; they’re an experience waiting to happen. Simple to create, delightful to behold, and utterly delicious to eat, they embody the joyful spirit of the holiday season. Whether you’re a seasoned baker or a kitchen novice, these no-bake wonders offer a stress-free way to add a touch of festive magic to your celebrations. Gather your ingredients, invite your loved ones to join in the fun, and create sweet memories that will last long after the last chocolate cup is enjoyed. Happy holidays, and happy no-baking!